How to Remove Mineral Deposits from Faucets Naturally With Vinegar
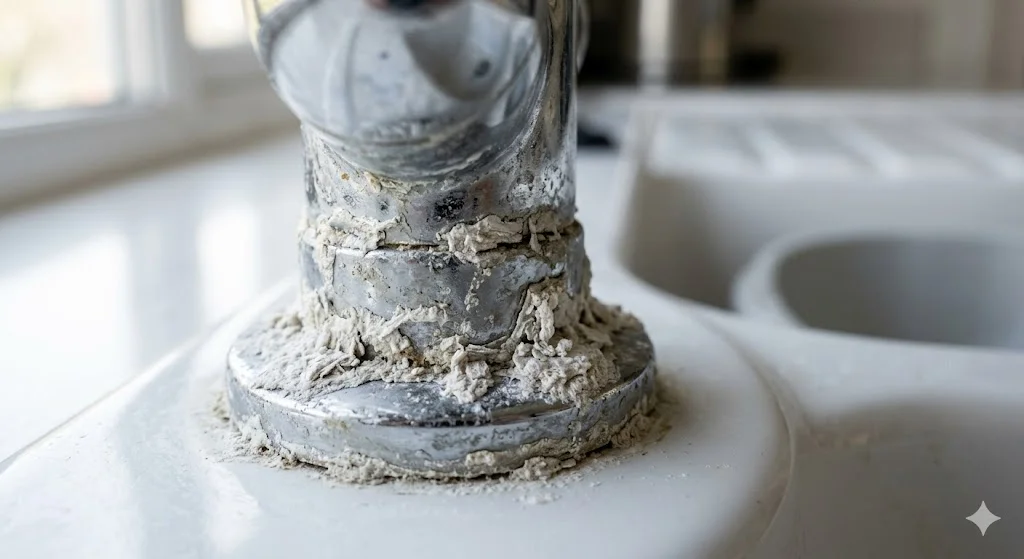
The first time I noticed those ugly white crusty rings around my kitchen faucet, I honestly thought something was wrong with the pipes. We had just moved into an older home in an area with notoriously hard water, and within a few weeks, every faucet in the house looked like it had been coated in some kind of weird chalky paste. I scrubbed at it with a regular sponge and dish soap, and absolutely nothing happened. It just laughed at me.
That started what I can only describe as a months-long obsession with figuring out how to get rid of mineral deposits without spending a fortune on commercial cleaners or calling a plumber for something that felt way too minor to justify that cost.
What I eventually learned is that this stuff — the white, gray, or sometimes even yellowish buildup you see around faucet bases, spouts, and handles — is almost entirely made up of calcium and magnesium deposits left behind when hard water evaporates. And here’s the thing nobody tells you upfront: the most effective cleaners for mineral deposits are already sitting in your kitchen.
Why Natural Methods Work Better Than You’d Expect
I was skeptical at first. I’d grabbed a bottle of a popular commercial bathroom cleaner and sprayed it generously, let it sit, and wiped. It helped a little, but the results were underwhelming and the fumes were genuinely unpleasant. My partner has asthma, so harsh chemical sprays are something we try to avoid anyway.
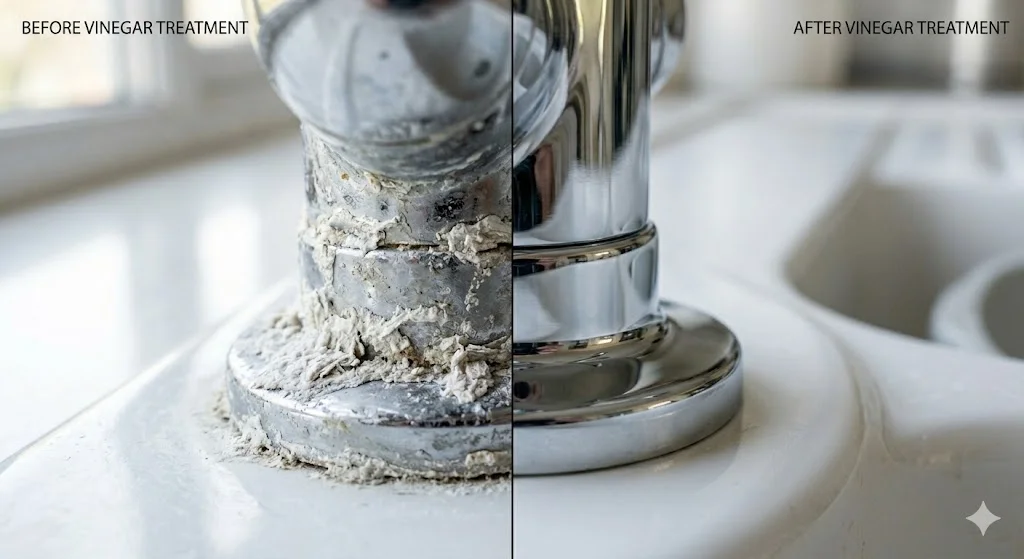
When I switched to natural acids — specifically white vinegar and lemon juice — I was genuinely surprised. These work because mineral deposits are alkaline in nature. An acidic solution essentially dissolves the bonds holding those deposits together. It’s basic chemistry, but it feels almost magical the first time you watch a crust that wouldn’t budge under scrubbing just… melt away.
The key is understanding that it’s not about scrubbing harder — it’s about soaking longer.
What You’ll Need Before You Start
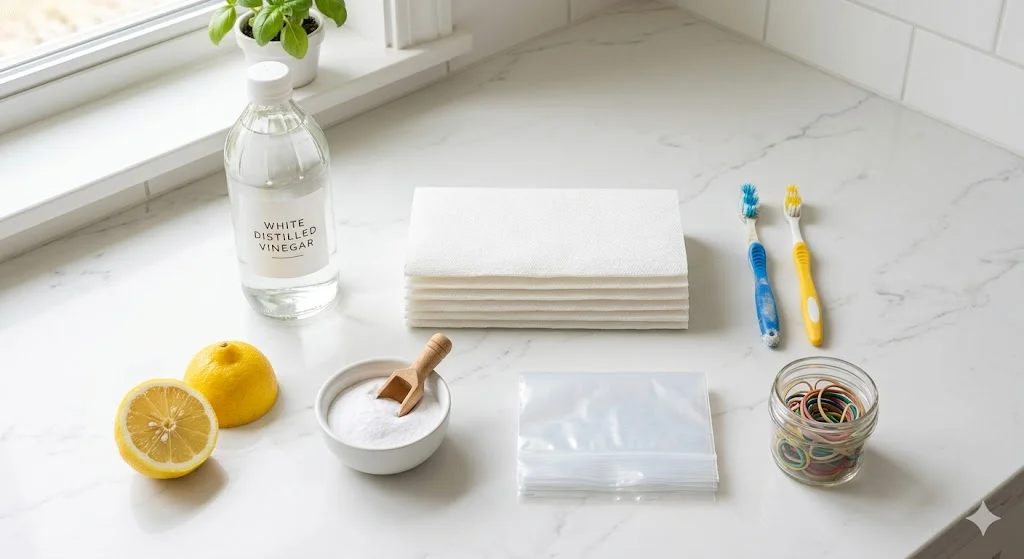
You don’t need anything fancy. Here’s what I keep under the sink specifically for this job:
White distilled vinegar — the cheap kind works perfectly. No need to use apple cider vinegar or anything flavored.
Fresh lemons or bottled lemon juice — lemon juice is slightly gentler and smells better, so I use it on chrome finishes I’m worried about scratching.
Baking soda — this is your gentle abrasive for when you need a little extra scrubbing power without scratching.
Old toothbrushes — I cannot overstate how useful these are for getting into tight spaces around the base and handle joints.
Paper towels or old rags — ones you don’t mind staining or throwing away.
Small plastic bags and rubber bands — this is the trick that changed everything for me when dealing with the faucet spout itself.
How to Remove Mineral Deposits from Faucets Naturally — Step by Step
Step 1 — Assess How Bad the Buildup Is
Before you do anything, take a good look at what you’re dealing with. Light buildup — the kind that looks like a faint white film — responds quickly, sometimes in under 30 minutes. Heavy buildup, the kind that’s thick, layered, and has been accumulating for months or years, is going to need longer soak times and possibly multiple rounds.
Also check your faucet’s finish. Chrome and stainless steel are generally safe with vinegar. Brushed nickel, matte black, or brass finishes can sometimes be more sensitive, so test a small hidden area first and don’t leave acidic solutions on them for extended periods.
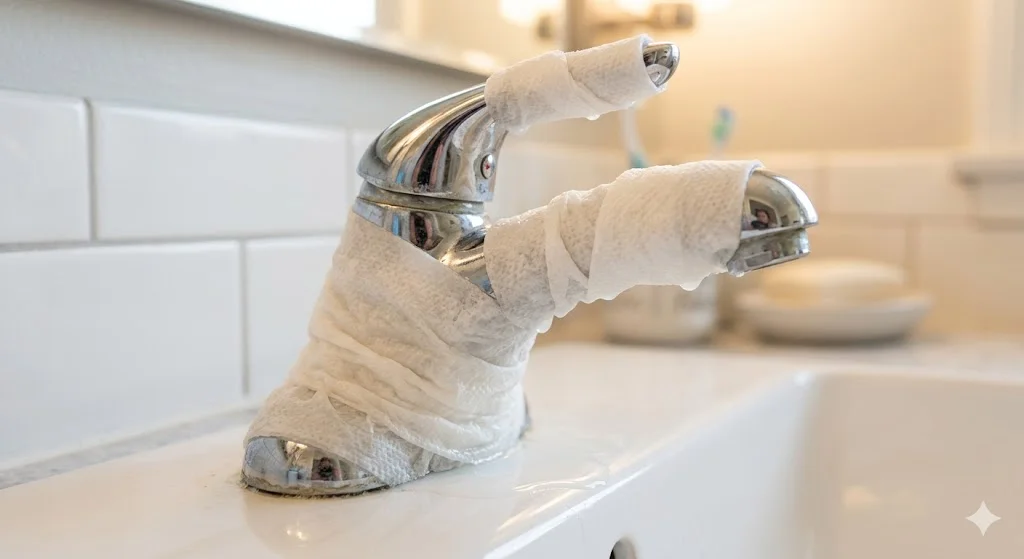
Step 2 — Soak Paper Towels or Rags in Undiluted White Vinegar
Pour white vinegar directly into a bowl or small container. Soak a few paper towels or strips of old cloth until they’re fully saturated. Then wrap these around the affected areas of the faucet — the base, the spout, the handles, anywhere you see that crusty buildup.
Press them firmly so there’s maximum contact between the vinegar and the deposits. The goal is to keep the acid in direct, prolonged contact with the mineral crust.
Leave this for at least 30 to 60 minutes. For heavy buildup, I leave it for 2 to 3 hours. I’ve even left it overnight on really stubborn spots — though I wouldn’t recommend that on delicate finishes.
H3: Step 3 — The Plastic Bag Trick for the Faucet Spout
This is genuinely one of the best tips I stumbled across. The inside of your faucet spout and the aerator (the little mesh screen at the very end) collect mineral deposits too, and that’s often what causes low water pressure.
Fill a small plastic bag — a sandwich bag works great — with undiluted white vinegar. Slip it over the faucet head so the spout is submerged in the vinegar. Secure it tightly with a rubber band. The bag should hold the vinegar right against the spout and aerator without it dripping everywhere.
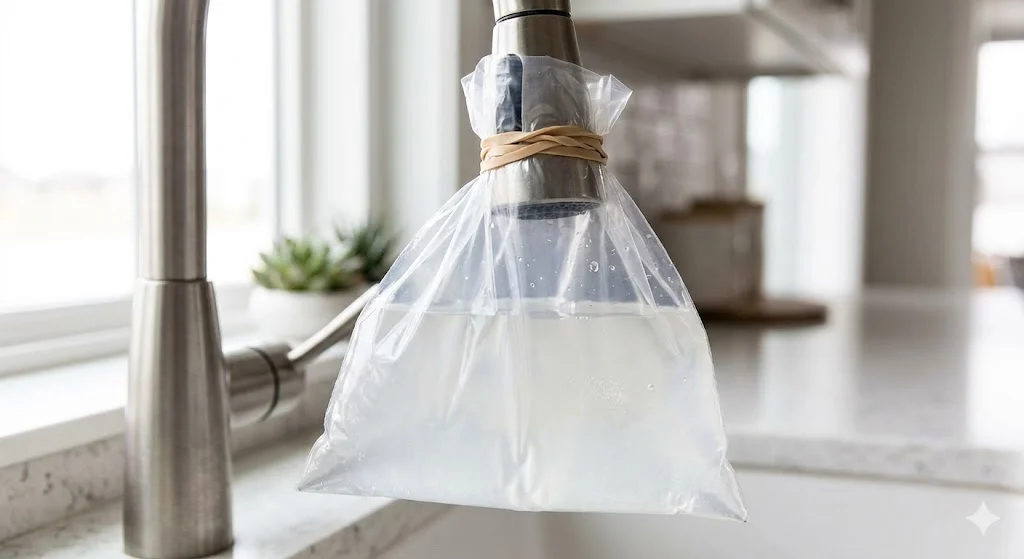
Leave this for an hour or two. You’ll often see the vinegar turn slightly cloudy as it pulls the minerals off. When you remove the bag, run the water for a minute and you’ll frequently notice the pressure has improved.
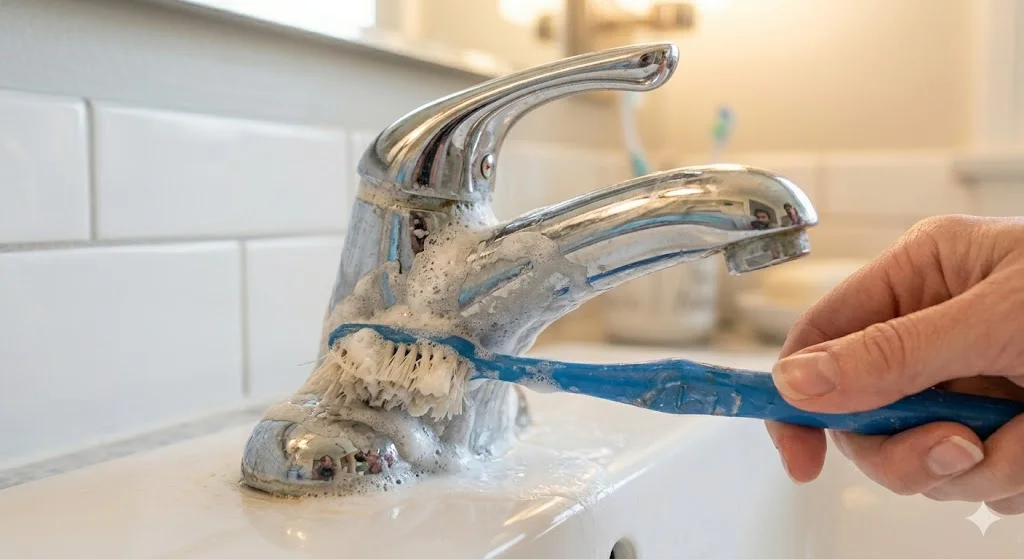
Step 4 — Scrub with Baking Soda for Extra Stubborn Spots
After the vinegar soak, most deposits will wipe away easily with a damp cloth. But for anything that’s still clinging on, make a paste with baking soda and just enough water to form a thick consistency. Apply this directly to the remaining buildup and let it sit for 10 minutes.
Then use your old toothbrush to scrub in small circular motions. The baking soda provides gentle abrasion without scratching the surface. This combination — vinegar loosening the deposits, baking soda physically removing what’s left — is more effective than either method alone.
One thing I learned the hard way: don’t mix vinegar and baking soda directly on the faucet thinking it will be twice as powerful. The fizzing reaction looks impressive, but they essentially neutralize each other. Use them sequentially, not simultaneously.
Step 5 — Clean the Aerator Separately
If your water flow seems weak even after cleaning the outside, remove the aerator entirely. Most aerators unscrew by hand — just turn counterclockwise. If it’s stuck, wrap it with a cloth and use pliers gently so you don’t scratch the finish.
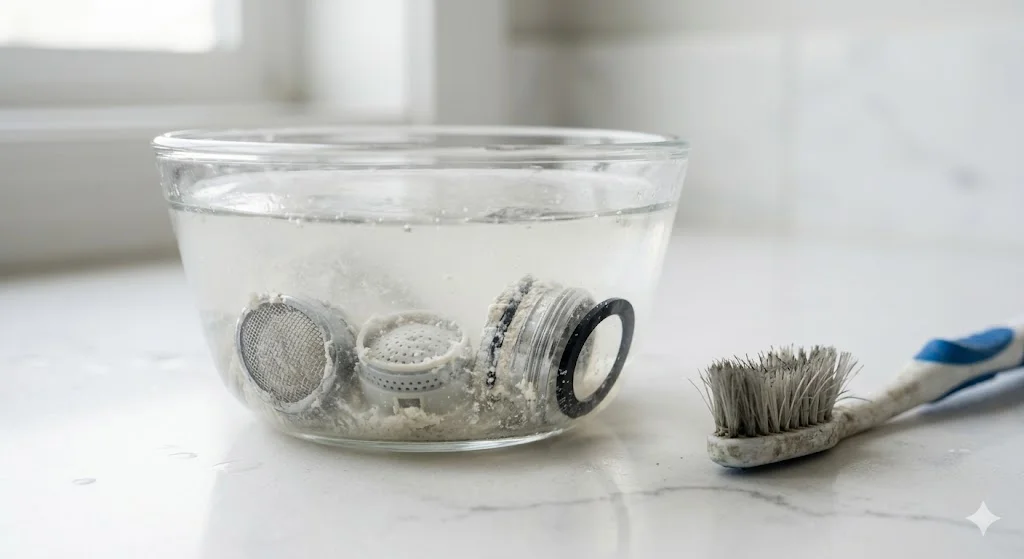
Drop the aerator into a small bowl filled with undiluted vinegar and let it soak for an hour. Use a toothbrush to clean the mesh screen. Rinse thoroughly before screwing it back on. I do this about once every two months now and it makes a noticeable difference in water pressure.
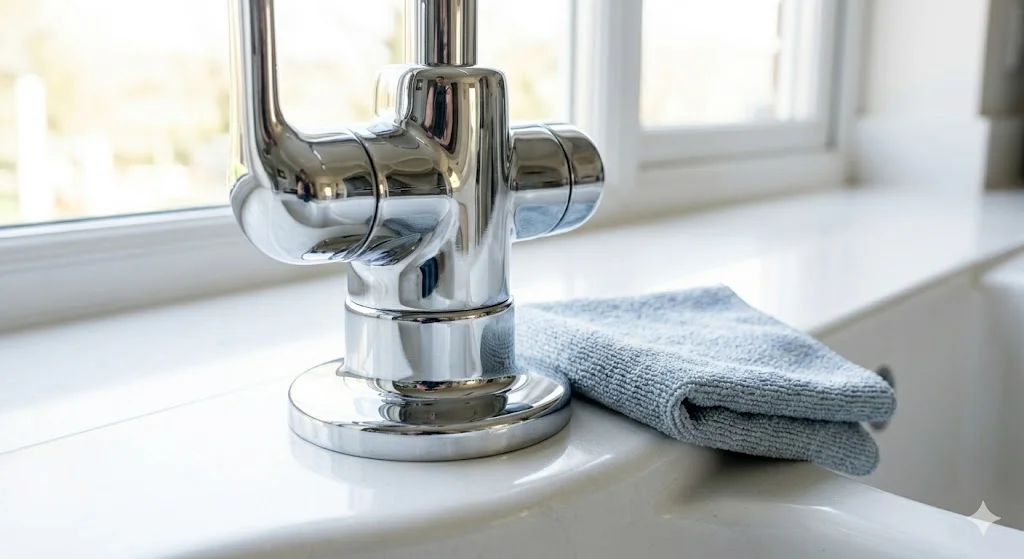
Step 6 — Rinse and Dry Thoroughly
Once everything is clean, rinse the entire faucet with clean water. This step matters more than people think. Any vinegar left sitting on the surface can eventually affect certain finishes over time.
After rinsing, dry the faucet completely with a soft cloth. This actually helps slow down future buildup. Water sitting on the surface is what causes the deposits in the first place, so drying the faucet after use is one of the simplest preventive habits you can build.
Using Lemon Juice as an Alternative
If you’re working on a faucet with a finish you’re nervous about, lemon juice is a gentler option. It’s less acidic than white vinegar, which means it’s a little safer on sensitive surfaces but also requires longer contact time.
Cut a lemon in half and rub it directly onto the affected areas. Let the juice sit for 30 to 45 minutes before wiping clean. You can also squeeze lemon juice onto paper towels and use the same wrapping method as the vinegar technique.
The added bonus is that lemon juice smells significantly better than vinegar, which matters if the fumes bother you or if you’re cleaning a bathroom faucet in a small, poorly ventilated space.
Mistakes I Made That You Can Avoid
The biggest one was not soaking long enough. I’d get impatient after 15 minutes, wipe it off, see that it was “mostly clean,” and call it good. But then within a few days the remaining deposits would attract new ones even faster. Commit to a full soak.
The second mistake was using rough scrubbing pads. I tried a green scouring pad once on my chrome kitchen faucet and left tiny scratches that I still notice today. Stick to soft cloths and toothbrushes.
I also wasted money for a while on commercial “hard water stain removers” that were mostly just diluted citric acid anyway. Once I understood the chemistry, I realized I was essentially buying a marked-up version of lemon juice. Save your money.
How Often Should You Do This?
Honestly, this depends entirely on your water hardness. In areas with very hard water, I clean faucet exteriors with the vinegar soak method about once a month. The aerators get done every two months. If you live somewhere with softer water, quarterly might be enough.
The best habit you can build is just drying your faucets after use. It sounds almost too simple, but keeping a small microfiber cloth near each sink and giving the faucet a quick wipe when you’re done dramatically slows down how fast deposits form. I’ve noticed a huge difference since I started doing this consistently.
A Note on Really Old or Severe Buildup
If you’ve moved into a place where the faucets haven’t been cleaned in years and the deposits are literally rock-hard and thick, multiple rounds of the vinegar treatment will be necessary. Don’t expect one soak to dissolve years of buildup in an hour.
In some cases, really severe buildup can harden around the aerator or inside valve components in a way that affects function. If after multiple cleaning sessions your water pressure is still poor or the faucet is leaking, it might genuinely be time to replace the aerator (they’re usually under five dollars) or call a plumber to look at the internals.
But honestly, for most faucets with typical hard water buildup, the methods above will handle it completely without spending much money or using a single harsh chemical.
Final Thoughts
There’s something genuinely satisfying about watching a faucet go from crusty and neglected back to gleaming with nothing more than vinegar and an old toothbrush. It took me a while to trust that natural methods could actually compete with commercial products, but the results speak for themselves.
The white vinegar soak method is my go-to. It’s cheap, it works, and it doesn’t require any special equipment or protective gloves. Pair it with the plastic bag trick for the spout, keep up with the aerator cleaning, and make drying your faucets a habit — and you’ll likely never have to fight severe mineral buildup again.


