How to Start Seeds Indoors Step by Step

The first time I tried starting seeds indoors, I killed an entire tray of tomato seedlings before they even got their second set of leaves. I had no grow lights, the windowsill was too cold, and I watered them every single day because I thought I was being helpful. Spoiler: I was drowning them.
That was three years ago. Since then, I have started hundreds of seeds indoors every late winter — tomatoes, peppers, basil, eggplant, even some flowers — and the process has become one of my favorite parts of the gardening year. There is something almost addictive about watching a tiny seedling push through soil when it is still freezing outside.
If you have been wanting to try this but feel overwhelmed or have already killed a few trays yourself, this guide is for you. I am going to walk you through everything I actually do, step by step, including the mistakes I made so you do not have to repeat them.
Why Start Seeds Indoors at All
You could just buy transplants from a nursery in spring. Plenty of gardeners do. But starting from seed gives you access to varieties that no nursery will ever stock. Heirloom tomatoes with names like Cherokee Purple or Mortgage Lifter. Peppers that range from mild to nuclear. Unusual basil varieties. It is also significantly cheaper once you have your supplies set up.
There is also something deeply satisfying about growing a plant from a literal speck of dust all the way to harvest. It changes the way you think about food.
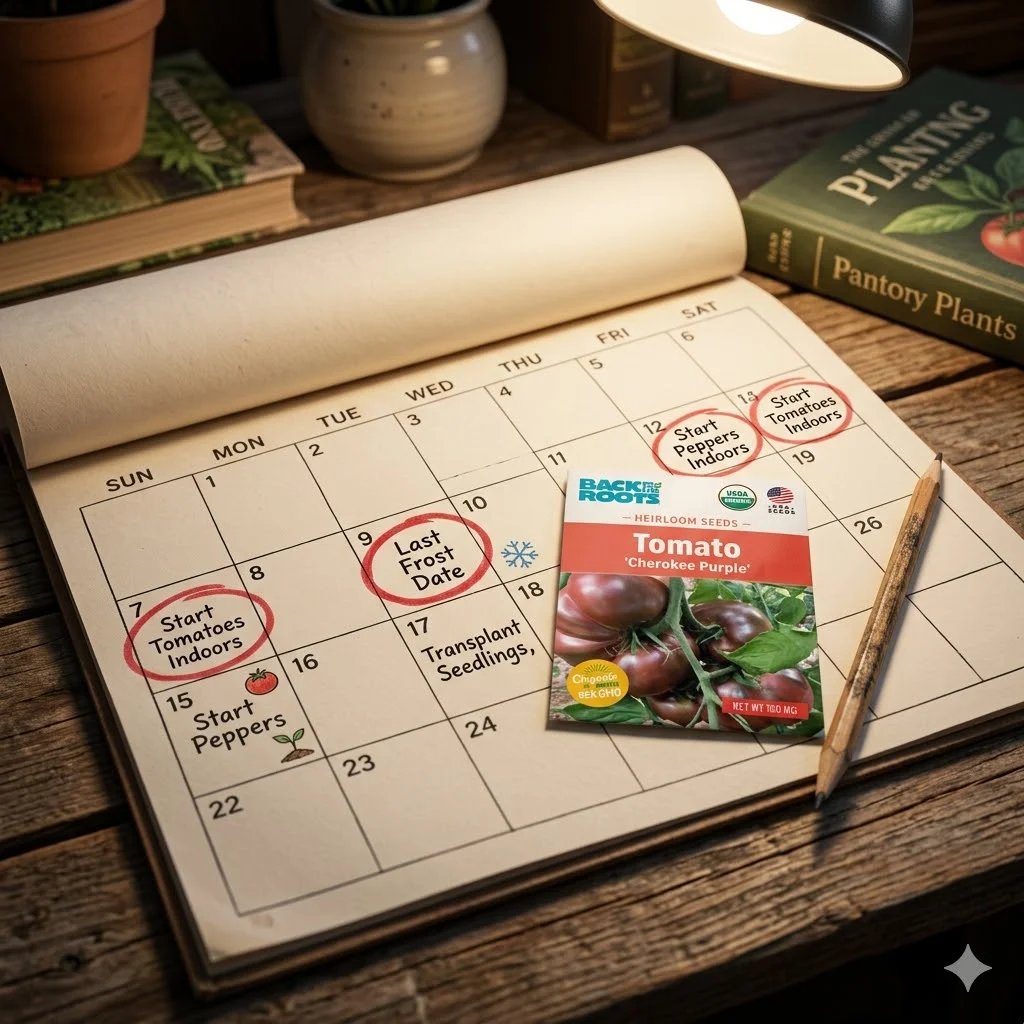
When to Start
Timing is everything with indoor seed starting. Start too early and your seedlings get leggy and root-bound before it is warm enough to transplant them. Start too late and you lose that whole advantage of an early head start.

The general rule is to count back from your last frost date. You can look this up by typing your zip code into the Old Farmer’s Almanac website or the USDA plant hardiness zone map. Once you have that date, seed packets will tell you something like “start indoors 6-8 weeks before last frost.” That is your window.
For me, that means starting tomatoes and peppers in late February. Basil I do not start until mid-March because it hates cold and there is no point rushing it.
What You Actually Need
You do not need a fancy setup, but you do need a few specific things. I learned this the hard way by trying to skip items and ending up with patchy, weak seedlings.
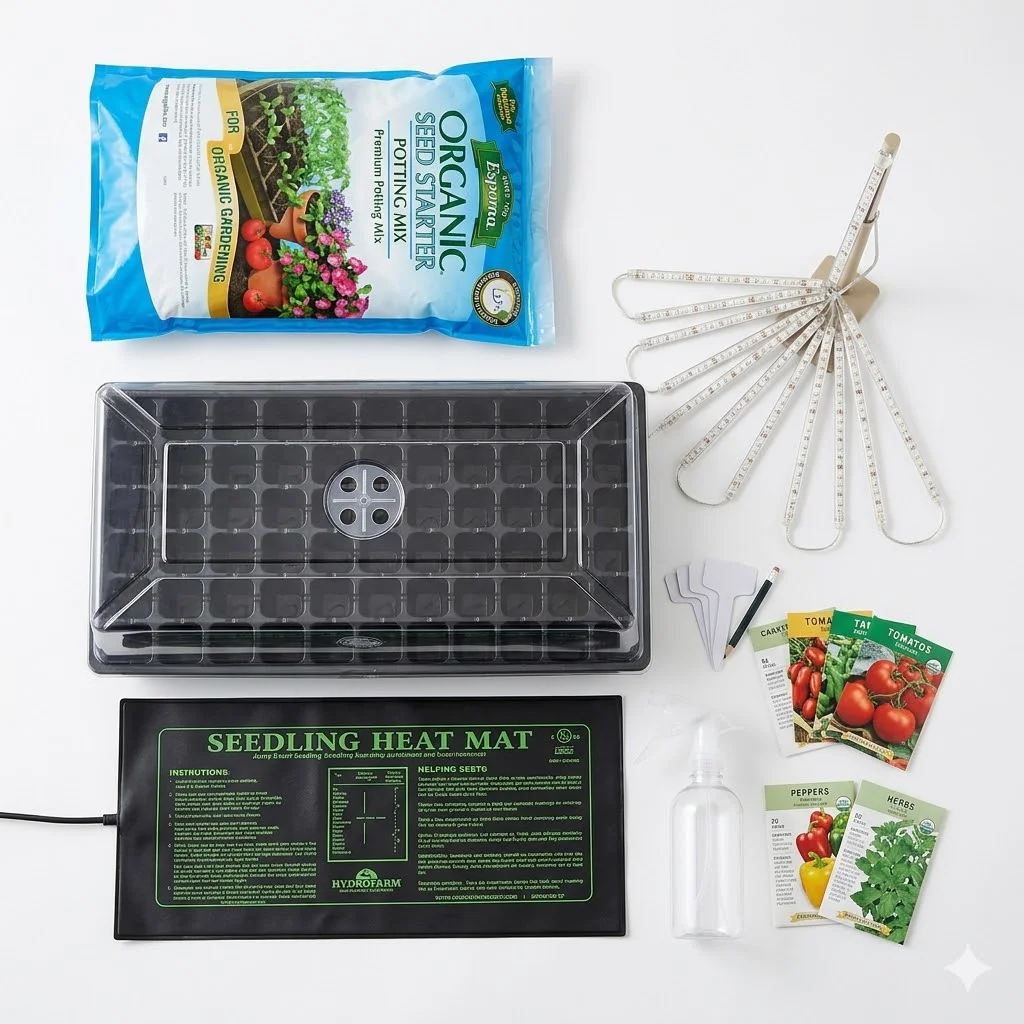
Seed starting mix. Not potting soil. Not garden soil. Seed starting mix is finer, lighter, and drains better. Regular potting soil is too dense for tiny roots and can harbor pathogens that kill seedlings. I use Espoma Organic Seed Starter, but any quality seed starting mix works.
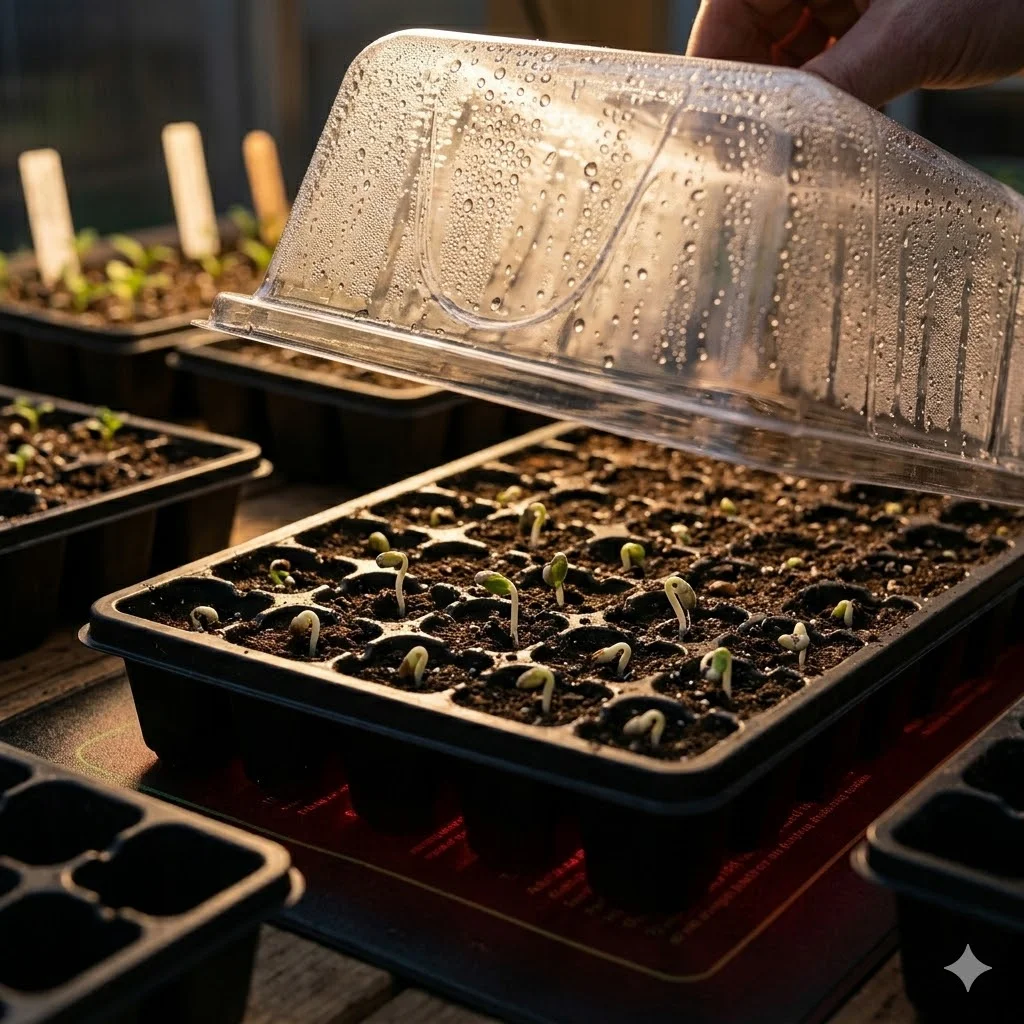
Trays and cells. I use 72-cell seed starting trays with a humidity dome. The dome traps warmth and moisture during germination. You can reuse these year after year if you rinse them with a diluted bleach solution between seasons.
Grow lights. This is the one thing I wish someone had told me before I started. A windowsill is almost never enough, even a south-facing one. Seedlings need 14-16 hours of strong, direct light, and windows in winter simply do not deliver that. I use a simple two-bulb fluorescent shop light I got from a hardware store for around $30. These days a lot of people use LED grow lights, and brands like Barrina or Roleadro make affordable strips that work really well.
A heat mat. Many seeds, especially tomatoes and peppers, germinate much faster when the soil is warm — around 75 to 80 degrees Fahrenheit. A seedling heat mat placed under your trays makes a real difference. Before I had one, my pepper seeds were taking three weeks to germinate. With the mat, they come up in eight to ten days.
A spray bottle or watering can with a gentle rose head. Strong streams of water displace tiny seeds and knock over fragile seedlings. A gentle mist or shower is what you want.
Step-by-Step: How to Start Seeds Indoors
Step 1: Prepare Your Containers
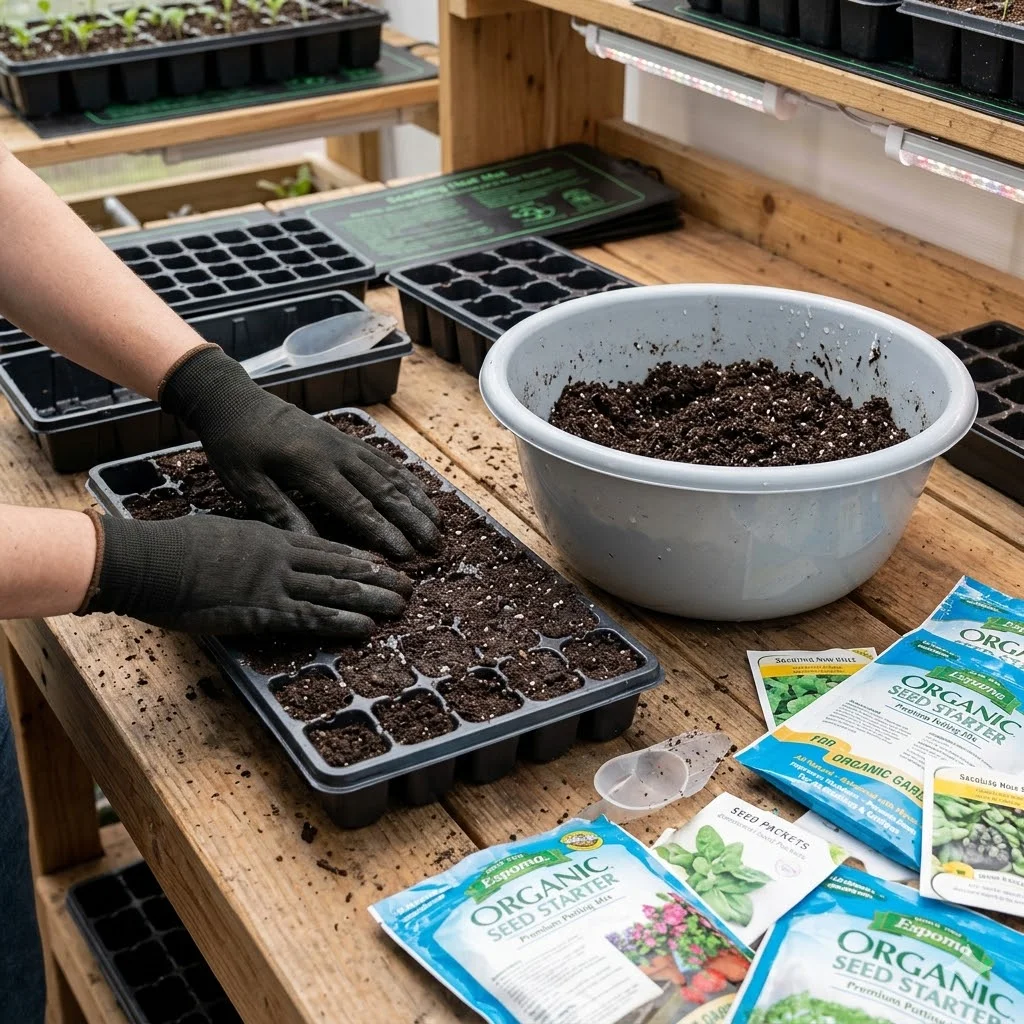
Fill your cells or containers with moist seed starting mix. The mix should feel like a wrung-out sponge — damp but not dripping. If you pour dry mix into cells and then try to water from the top, it repels water at first and creates uneven moisture. I always pre-moisten my mix in a large bowl before filling cells.
Step 2: Sow Your Seeds
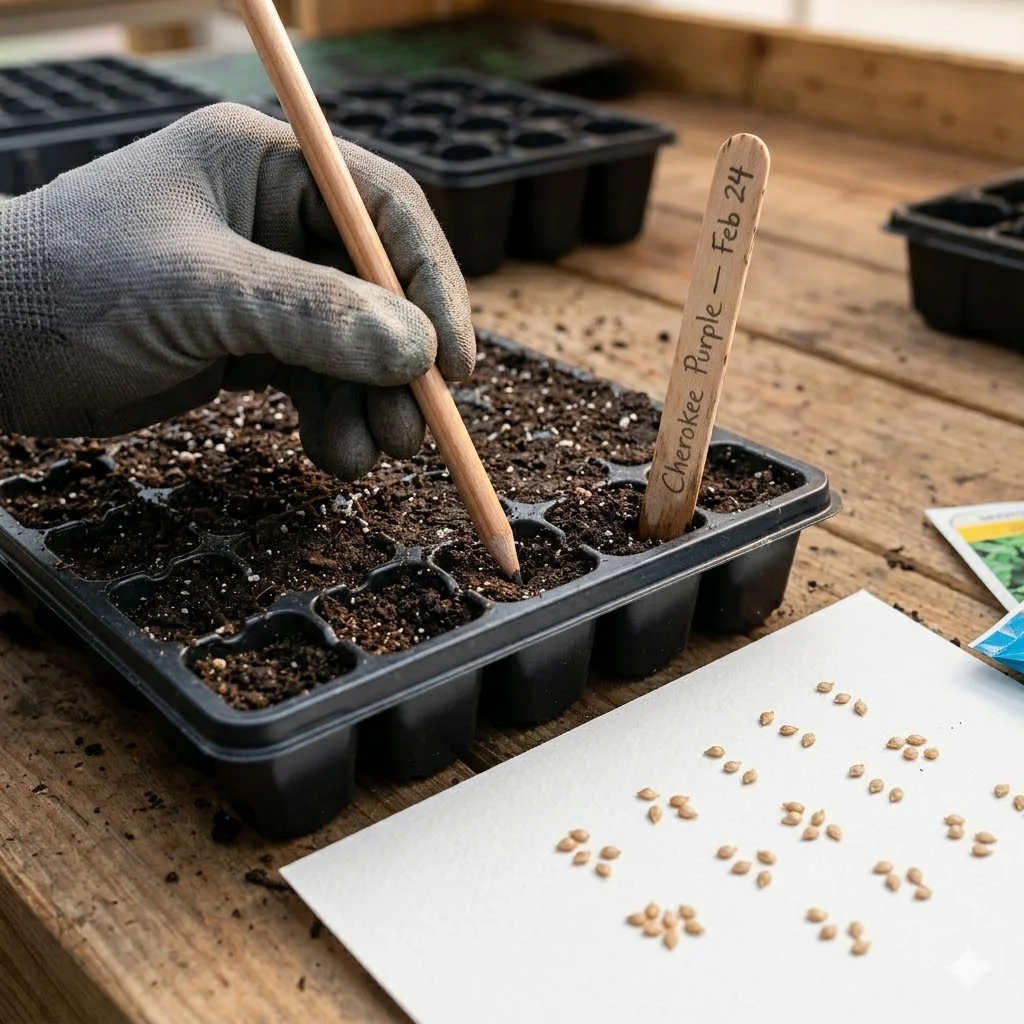
Read the seed packet. This sounds obvious, but people skip it. The packet tells you how deep to plant (most small seeds go just 1/4 inch deep), whether seeds need light to germinate, and how many days to expect germination.
Make a small indentation with a pencil or your finger. Drop one or two seeds per cell. Cover lightly with mix. Gently press down so the seed makes good contact with the soil. Label your trays. Every single time I have skipped this step, I have regretted it.
Step 3: Create a Warm, Humid Environment
Put the humidity dome on your tray. Place it on a heat mat if you have one. You do not need lights yet — seeds germinate in the dark. What they need is warmth and moisture.
Check the trays every day. The soil should stay consistently moist. If it looks dry on top, mist gently with a spray bottle. Do not let it dry out completely during germination.
Step 4: Watch for Germination
This part is genuinely exciting. Keep an eye out for the first tiny sprouts pushing through. Different seeds have very different germination times. Tomatoes usually take five to ten days. Peppers can take ten to twenty-one days. Basil pops up in about four to seven days.
The moment you see sprouts, remove the humidity dome and get them under lights immediately. This is a step people often delay by a day or two, thinking the seedlings need a little more time. But even one extra day under a dome with no light can cause etiolation — that pale, stretched, floppy stem that is the hallmark of a light-starved seedling.
Step 5: Set Up Your Lights
Position your grow light two to three inches above the tops of your seedlings. As they grow taller, raise the light to maintain that distance. Set a timer so the lights run for 16 hours per day. I use a basic digital outlet timer that costs a few dollars.
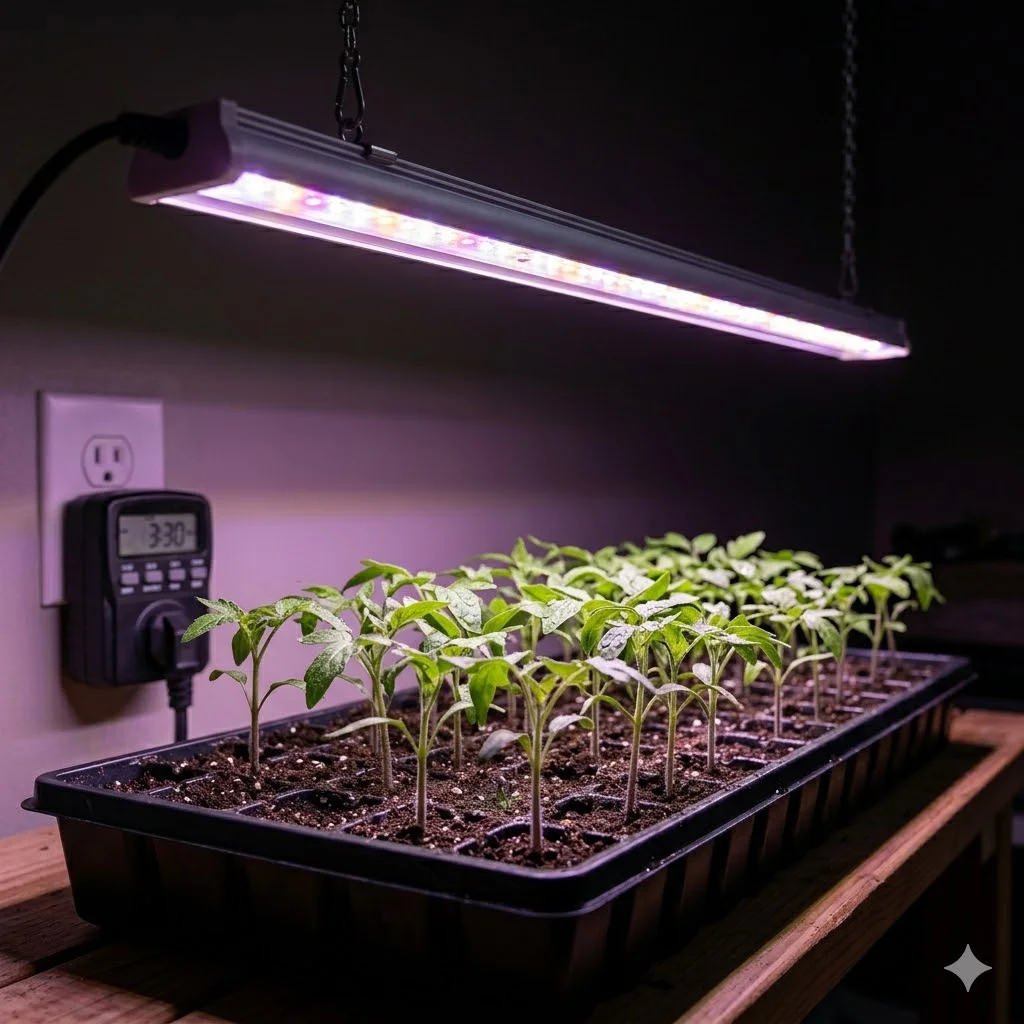
I have seen people try to use a phone app to remind themselves to turn lights on and off manually. That lasts about three days before it falls apart. Just get a timer.
Step 6: Water Correctly
Overwatering kills more seedlings than anything else. I know this because I was a serial overwatering offender. The rule is simple: water when the top of the soil starts to feel barely dry, not when it is bone dry, but not when it is still moist.
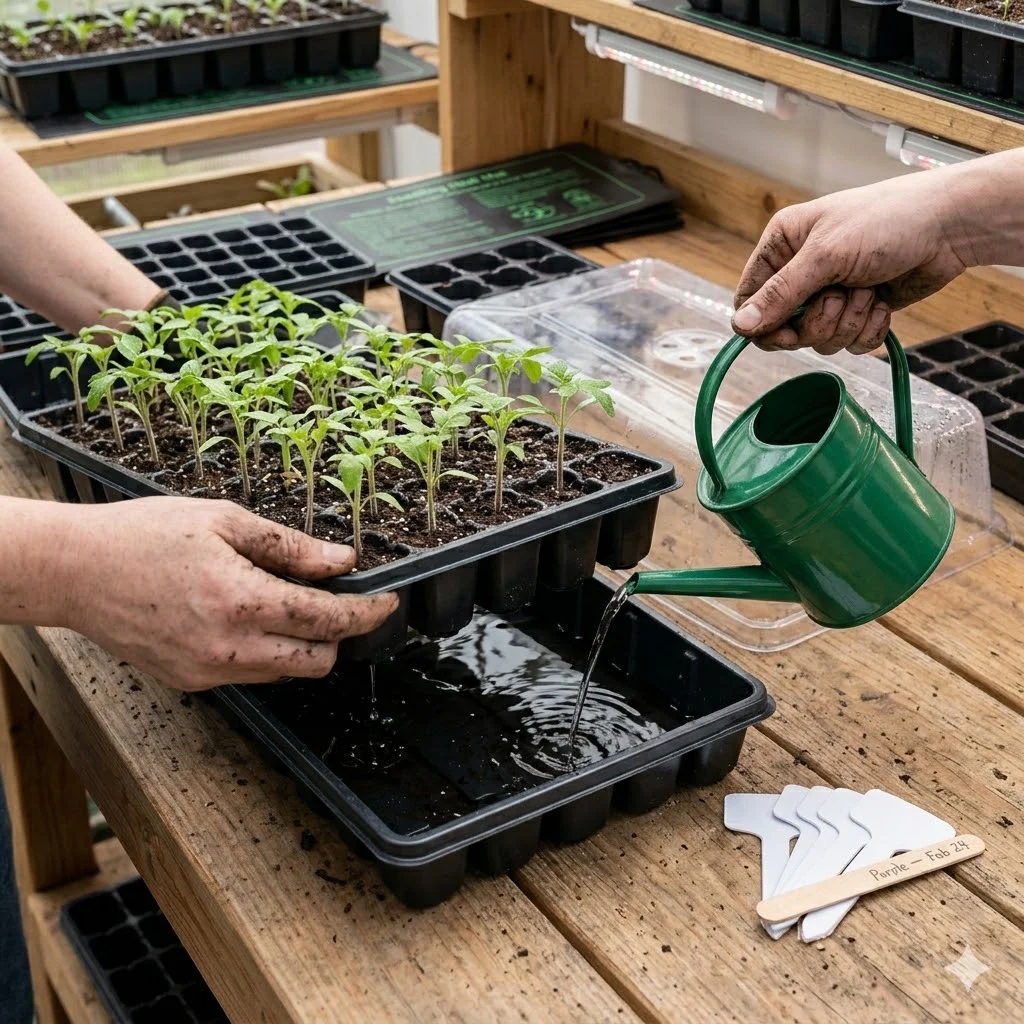
Whenever possible, water from the bottom. Pour water into the tray beneath your cells and let the soil wick it up from the bottom. This encourages roots to grow downward and prevents the fungal disease called damping off, which causes seedlings to suddenly collapse at the soil line overnight. If you have had this happen, bottom watering dramatically reduces the risk.
Step 7: Feed Your Seedlings
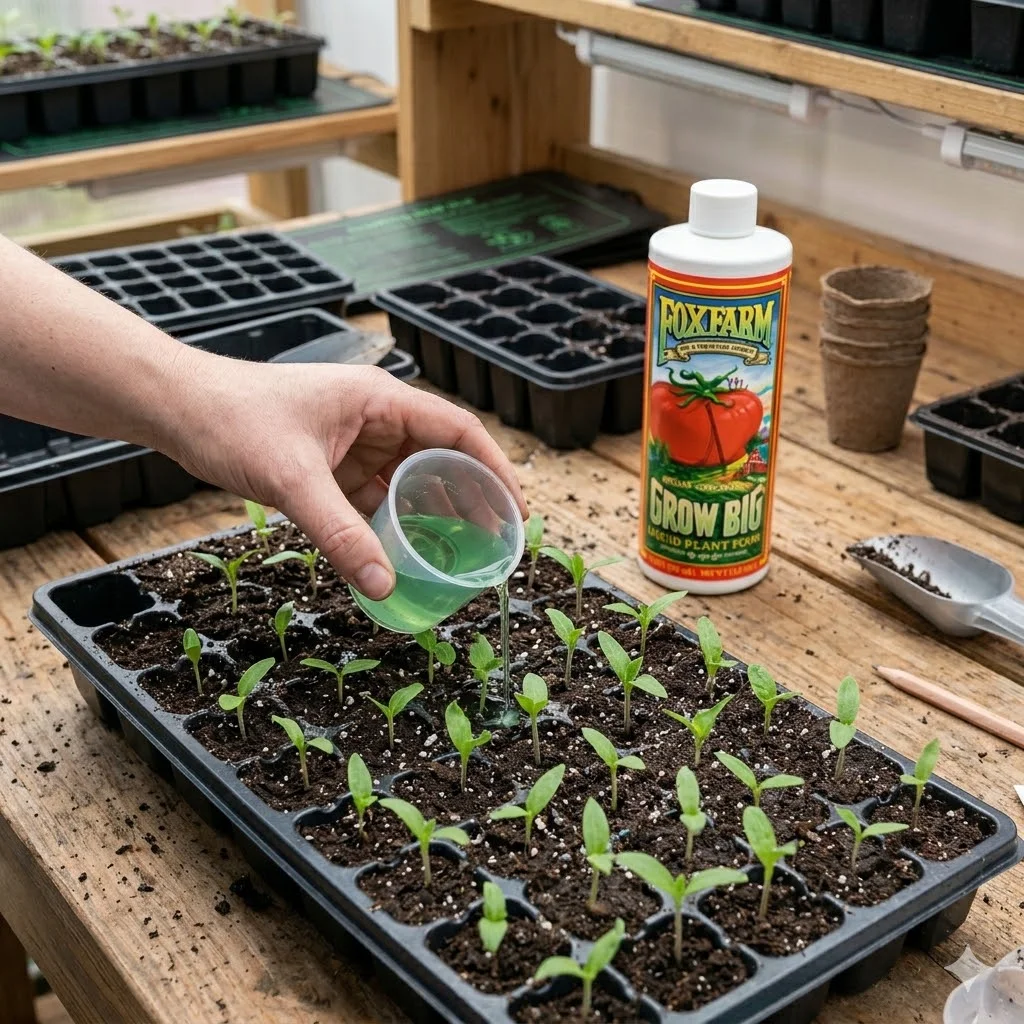
Seed starting mix has very few nutrients. Once seedlings have their first true leaves (the second set of leaves, which look more like the adult plant), it is time to start feeding. I use a diluted liquid fertilizer like Fox Farm Grow Big at half the recommended strength once a week. Do not skip this step — seedlings that are not fed will be pale, slow, and weak.
Step 8: Harden Off Before Transplanting
This is the step beginners almost always skip, and then they wonder why their plants wilted or got sunburned after going outside.
Hardening off means gradually introducing your indoor-grown seedlings to outdoor conditions over one to two weeks. Start by setting them outside in a sheltered, shaded spot for just one or two hours on the first day. Increase the time each day. Introduce more direct sun gradually. By the end of the two weeks, they should be able to handle a full day outside without stress.
Mistakes That Will Set You Back
Using regular potting soil. It is too heavy, holds too much water, and can introduce disease.
Not labeling your trays. You will absolutely forget which tray is which, especially if you are starting multiple varieties.
Relying on a windowsill for light. You will get stretched, floppy seedlings that struggle to recover.
Skipping hardening off. Going from 16 hours of artificial light indoors to full sun outdoors is a shock. Plants need transition time.
Watering on a schedule instead of by feel. Soil dries at different rates depending on temperature, humidity, and pot size. Check the soil, not the calendar.
A Note on Keeping It Simple
You do not need to buy the most expensive setup. My grow light cost $28 at the hardware store. My heat mat was $22 on Amazon. My trays I have been reusing for three years. Total setup cost was under $80, and it has more than paid for itself in plants.
If you are just starting out, pick two or three things to grow your first year — tomatoes and basil are a great combination — and focus on getting those right before expanding to a dozen different crops.
The learning curve is real, but it flattens out quickly. By your second season, you will already know what works in your specific home, with your specific light setup and your particular watering habits. That knowledge is genuinely valuable, and it is something no nursery transplant can ever give you.
Start small, pay attention, and do not give up if your first tray does not make it. Mine did not either.


