How to Grow Roses for Beginners: What Nobody Tells You Until You’ve Killed a Few Plants
I bought my first rose bush on impulse.
It was a Saturday morning at a local nursery, and there it was — this deep red hybrid tea rose sitting on a clearance shelf, looking dramatic and gorgeous. I paid seven dollars for it, brought it home, dug a random hole in my backyard, shoved it in, watered it once, and thought I was done.
Three weeks later, it was dead.
Not just sad-looking. Completely, embarrassingly dead. Yellow leaves, black stems, the whole disaster. I had no idea what went wrong, and honestly I was a little offended — I’d kept a cactus alive for four years, how hard could a rose be?
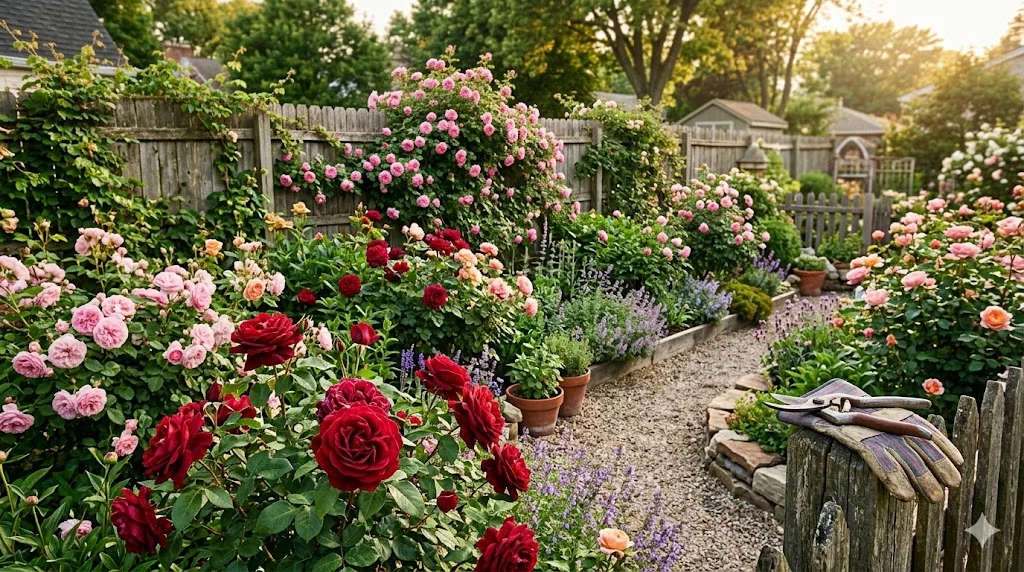
Turns out, pretty hard. But also totally manageable once you understand what roses actually need. I’ve been growing them for six years now, and my garden has somewhere around twenty-two rose bushes ranging from climbing varieties on an old fence to miniature ones in terracotta pots on my porch. I’ve made almost every mistake in the book, and I want to help you skip the expensive, frustrating part and get straight to the blooms.
Why Roses Have a “Difficult” Reputation (And Why It’s Slightly Unfair)
Roses have this reputation for being high-maintenance divas, and honestly, some of that is earned. But a lot of beginners make things harder than they need to be because they skip the basics — especially choosing the right variety for their climate and skill level.

Old-fashioned roses and certain modern shrub roses are incredibly forgiving. Knockout roses, for example, practically grow themselves. Hybrid teas, on the other hand, are the supermodels of the rose world — stunning but needy. If you’re just starting out, do yourself a favor and don’t begin with hybrid teas.
Step 1: Choose the Right Rose for Where You Live
Before you buy anything, think about your hardiness zone. In the US, you can look this up on the USDA Plant Hardiness Zone Map (it’s free online — just enter your zip code). If you’re gardening in the UK or elsewhere, your local garden center will know what’s suitable.
Here’s a simple breakdown of beginner-friendly types:
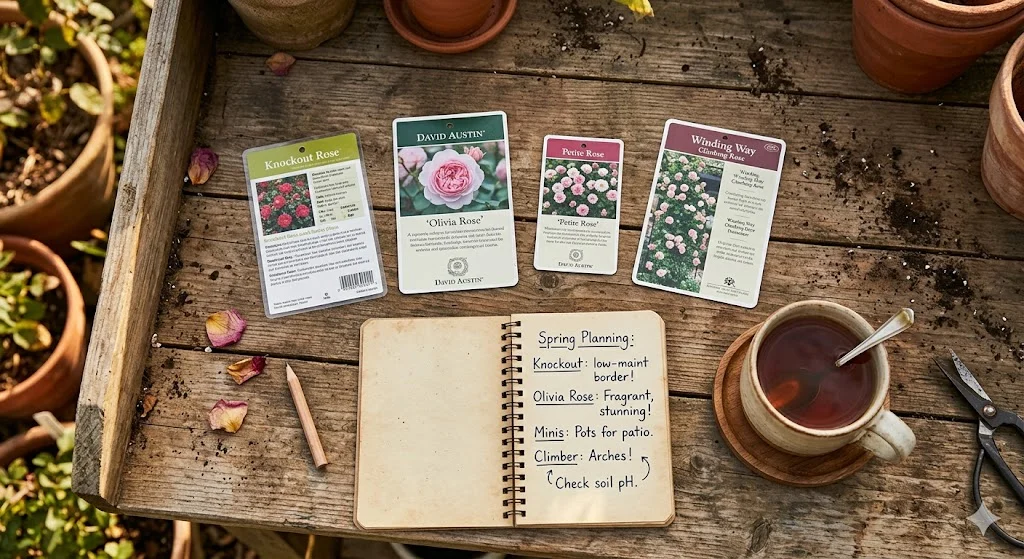
Knockout Roses are almost impossible to kill. They’re disease-resistant, bloom repeatedly, and don’t need deadheading. If you’re nervous, start here.
Shrub Roses like the David Austin “English roses” are gorgeous, smell incredible, and are hardier than they look. The variety called ‘Olivia Rose’ is one I grow and recommend to everyone.
Climbing Roses are great if you have a fence or trellis, but they do need some guidance and pruning. Save these for after your first season.
Miniature Roses work beautifully in containers on balconies or patios. They need slightly more attention to watering but are great for small spaces.
Avoid buying roses based purely on how they look in the photo on the tag. Always check if the variety is suited to your climate, how disease-resistant it is, and whether it re-blooms or only flowers once a season.
Step 2: Pick the Right Spot
Roses need at least six hours of direct sunlight per day. This is non-negotiable. My first rose died partly because I planted it on the north side of my house where it got maybe two hours of sun. No amount of fertilizer fixes a bad location.
Also pay attention to air circulation. Roses packed too close to walls or other plants are more prone to fungal diseases like black spot and powdery mildew. Give each plant breathing room — at least 3 feet between shrubs.
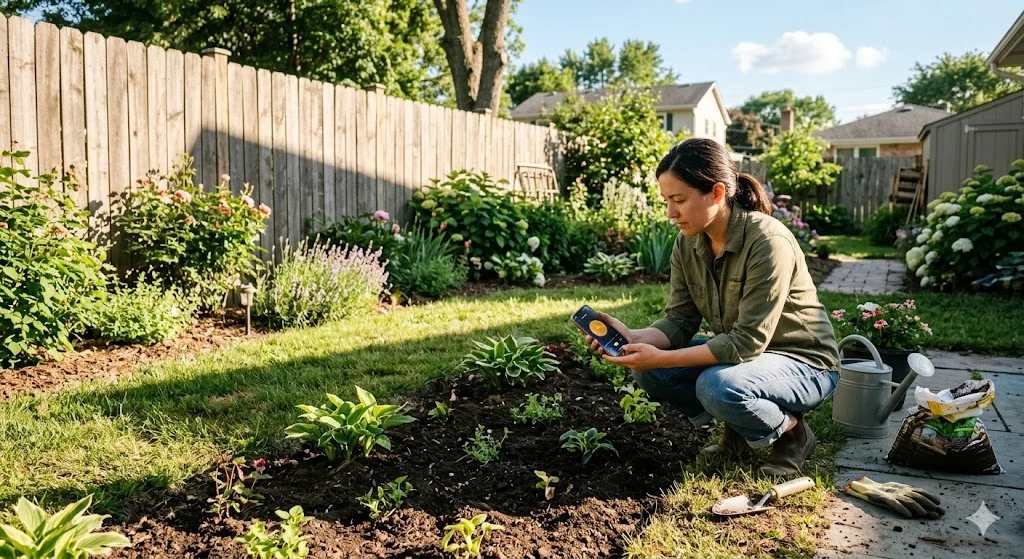
Avoid low-lying spots where water pools after rain. Roses hate wet feet. Their roots need moisture but they also need drainage.
Step 3: Prepare the Soil Before You Plant
This step is where most beginners skip to save time, and then wonder why their roses look miserable. Good soil prep makes everything easier afterward.
Roses love slightly acidic soil with a pH between 6.0 and 6.5. You can test your soil with an inexpensive kit from any garden center — I use the Rapitest brand, which costs about five dollars and has always been accurate enough for home use.
If your soil is heavy clay (it clumps in your fist and stays clumped), mix in some compost and coarse sand to improve drainage. If it’s very sandy, add compost to help it hold moisture and nutrients.
Dig your planting hole about twice as wide and just as deep as the root ball. Mix some compost into the soil you removed. That amended soil is what you’ll use to backfill around the roots.

Step 4: Plant Your Rose Correctly
This is where many people — including past me — go wrong in small but significant ways.
For bare-root roses (which you sometimes buy in late winter), soak the roots in water for 12 to 24 hours before planting. This rehydrates them and gives them a real head start.
When planting, the bud union (that knobby swollen bit where the canes meet the roots) should sit just at or slightly above soil level in warm climates, and about an inch below in areas with harsh winters. This protects it from frost damage.
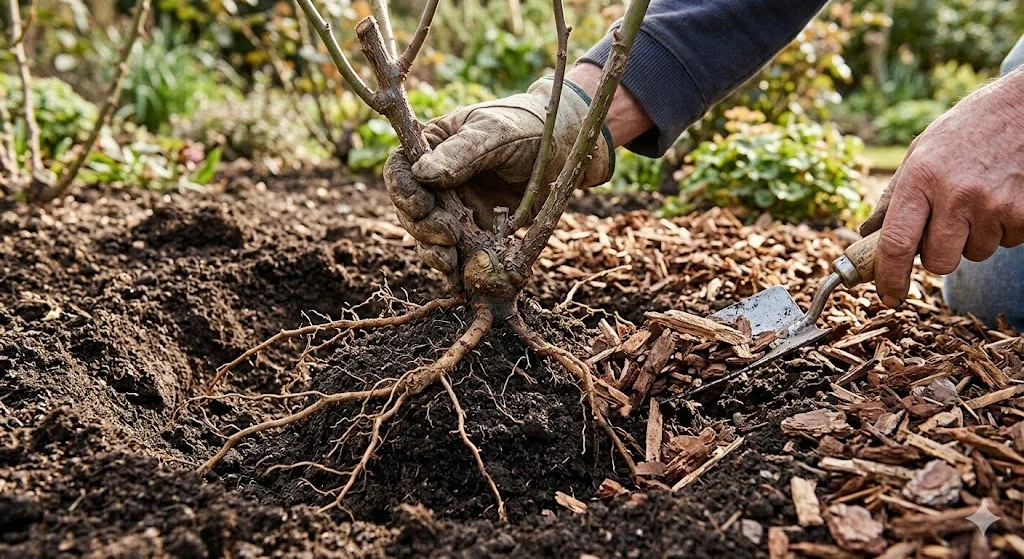
Backfill the soil gently, firming it as you go to remove air pockets. Water deeply right after planting — not a sprinkle, but a slow, thorough soak. Then add a 2 to 3 inch layer of mulch around the base (but not touching the stem) to retain moisture and suppress weeds.
Step 5: Water the Right Way
Roses need consistent moisture, especially in their first season while they’re establishing roots. But how you water matters as much as how often.
Always water at the base of the plant, not overhead. Wet leaves are an open invitation for black spot and other fungal issues. I learned this the hard way after losing two plants to black spot in my second year of growing roses.
In general, roses need about an inch of water per week (including rainfall). In hot, dry summers, they may need more. A simple rain gauge in the garden takes the guesswork out of it — I’ve had the same five-dollar plastic one from the hardware store for four years.
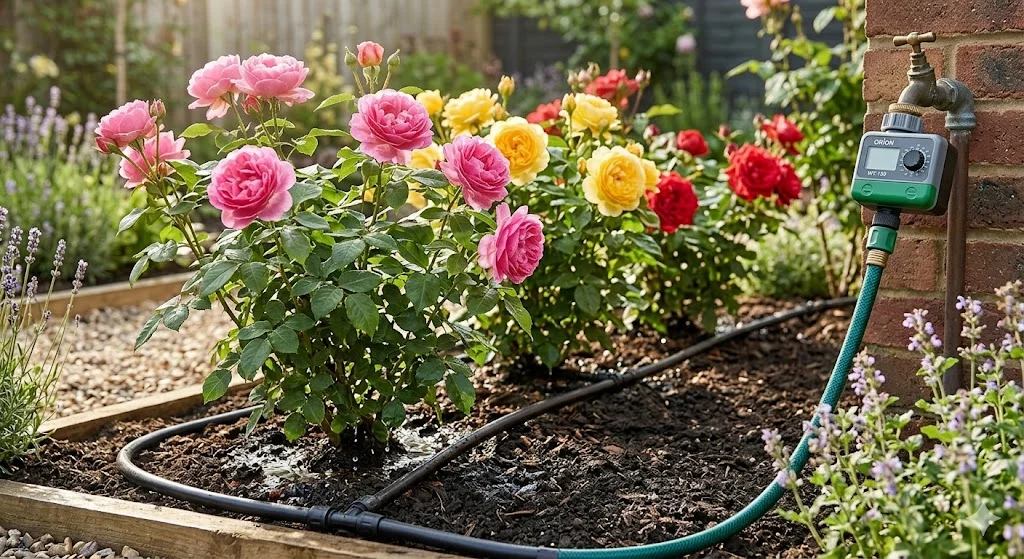
Drip irrigation is genuinely worth setting up if you have several rose bushes. It keeps the foliage dry, delivers water to the roots, and saves water. I use a basic timer system from my local garden supply store and it’s made a massive difference.
Step 6: Feed Your Roses (But Don’t Overdo It)
Roses are hungry plants, but there’s such a thing as too much fertilizer. Over-fertilizing, especially with high-nitrogen products, gives you lots of lush green leaves and almost no flowers. Not exactly the point.
Start feeding in early spring when you see new growth beginning. Use a fertilizer formulated for roses — I’ve used both Miracle-Gro Rose Food and organic options like fish emulsion with good results. Organic feeds are slower to act but gentler, and you’re less likely to accidentally burn the roots.
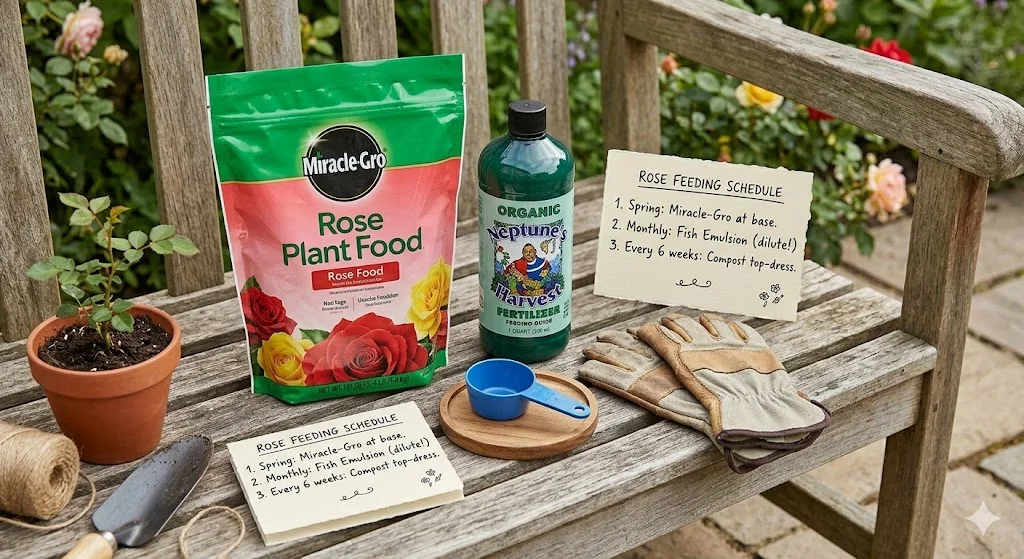
Feed every four to six weeks through summer, then stop feeding about six weeks before your first expected frost. Late feeding pushes new tender growth that gets killed by cold, which weakens the whole plant.
Step 7: Prune With Confidence
Pruning intimidates beginners more than anything else, but it’s really just a matter of understanding what you’re trying to achieve: removing dead, damaged, or crossing canes, and encouraging new growth and airflow.
The main pruning session happens in late winter or very early spring, just as the forsythia starts blooming (that’s the classic timing cue gardeners use). Cut out any dead wood, reduce the plant by roughly one third, and make clean cuts at a 45-degree angle just above an outward-facing bud.
Use a sharp, clean pair of bypass pruners — dull blades crush stems instead of cutting them, which invites disease. I use Felco No. 2 pruners and have had them for eight years. They’re worth the price.
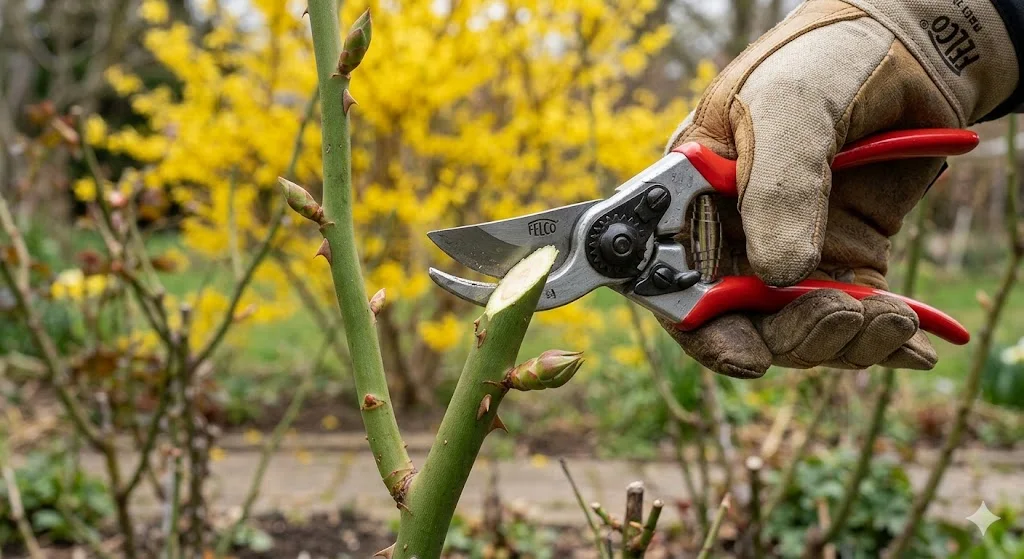
Throughout the season, deadhead spent blooms (snip just above the first set of five leaflets) to encourage repeat flowering on reblooming varieties.
Common Mistakes to Avoid
Planting in too much shade. Roses really do need sun. No shortcuts here.
Watering too shallowly. A quick sprinkle does more harm than good — it encourages surface roots that dry out fast. Water deeply and less frequently instead.
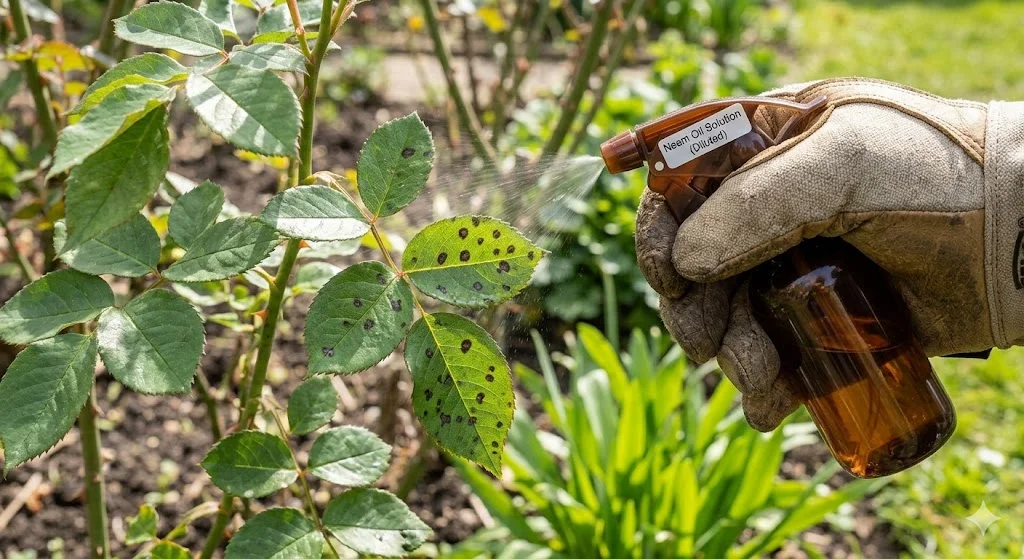
Ignoring the first sign of disease. Black spot starts as small dark circles on leaves. Catching it early and removing affected leaves (and not composting them) keeps it from spreading. I use a diluted neem oil spray as a preventive measure every couple of weeks.
Buying exotic varieties before mastering the basics. I once spent forty dollars on a rare yellow climber in my second season. It died within a month. Start with proven, disease-resistant varieties and work your way up.
Planting too deeply. Burying the bud union too far down can cause the rose to revert to the less attractive rootstock it’s grafted onto, or simply rot.
What Actually Makes Roses Rewarding
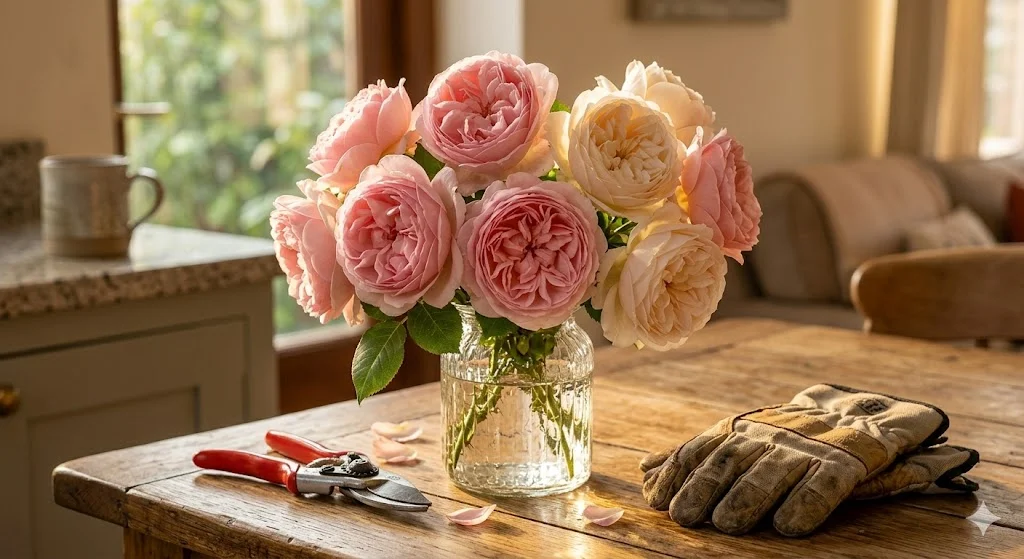
After all the mistakes, the dead plants, the black spot outbreaks, and the years of learning — here’s what I can tell you honestly: there is nothing quite like cutting your own roses and putting them in a vase on your kitchen table.
The smell of a David Austin rose on a warm June morning is something you just can’t buy at a grocery store. The flowers you grew yourself, in your own soil, from your own hands — they just hit differently.
Roses reward patience and attention. They’re not plants you can completely ignore, but they’re also not as impossible as their reputation suggests. Start small. Choose forgiving varieties. Get your soil right. Water properly. And resist the urge to over-fertilize.
Your first successful bloom, the one you had to earn through a little trial and error, will absolutely be worth it.


