15 DIY Self Watering Planter Ideas That Actually Work

I killed a lot of plants before I figured out self watering planters.
Not just a few. We’re talking an embarrassing graveyard of succulents, herbs, and one very sad fiddle leaf fig that I paid way too much for. The problem was never that I didn’t care — it was that I cared inconsistently. I’d water everything on a Sunday, forget about it for ten days, panic, then drown the whole thing trying to make up for it.
A friend of mine mentioned she’d been making her own self watering containers from old plastic bottles, and honestly, I thought it sounded like some Pinterest thing that looks good in photos but doesn’t actually work. I was wrong. After building my first one on a random Saturday afternoon with stuff I already had at home, I was genuinely hooked. These things work. And once you understand the basic wicking principle, you can apply it to almost any container you have sitting around.
So here are 15 DIY self watering planter ideas I’ve either built myself, tested in my own space, or learned from people in my gardening group who have real soil under their fingernails.
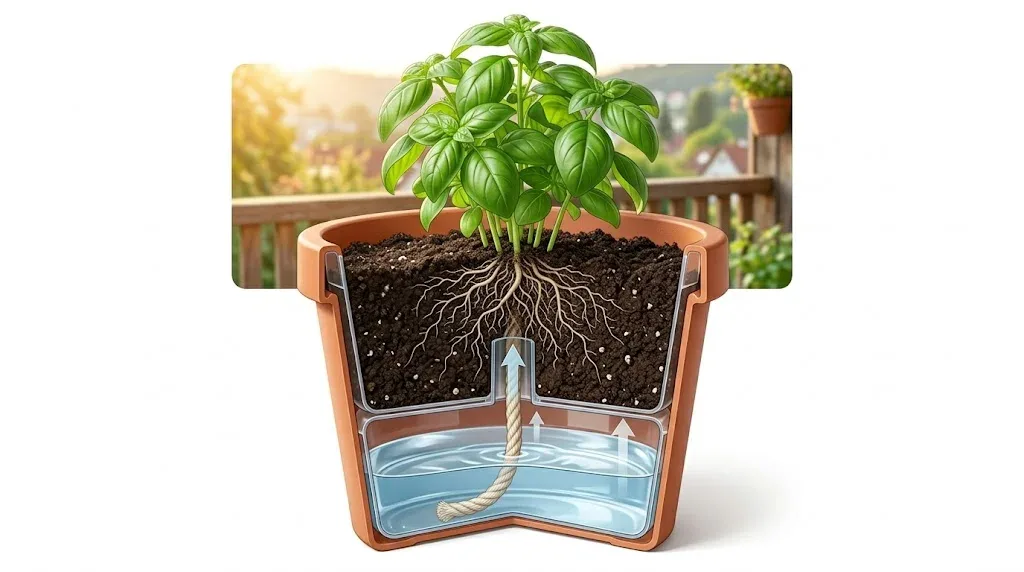
What Makes a Self Watering Planter Actually “Self Watering”
Before jumping into the builds, it helps to understand what’s going on. A self watering planter has two chambers — one for soil and one for water. The plant draws moisture upward through a wick or a porous material via capillary action. You don’t pour water into the soil directly. You refill a reservoir, and the plant drinks what it needs, when it needs it.
This is why these setups are so forgiving. Overwatering becomes almost impossible. The roots take moisture from below rather than sitting in soggy soil from above, which means better drainage and healthier root systems overall.
Once I understood that, every project on this list made a lot more sense to me.
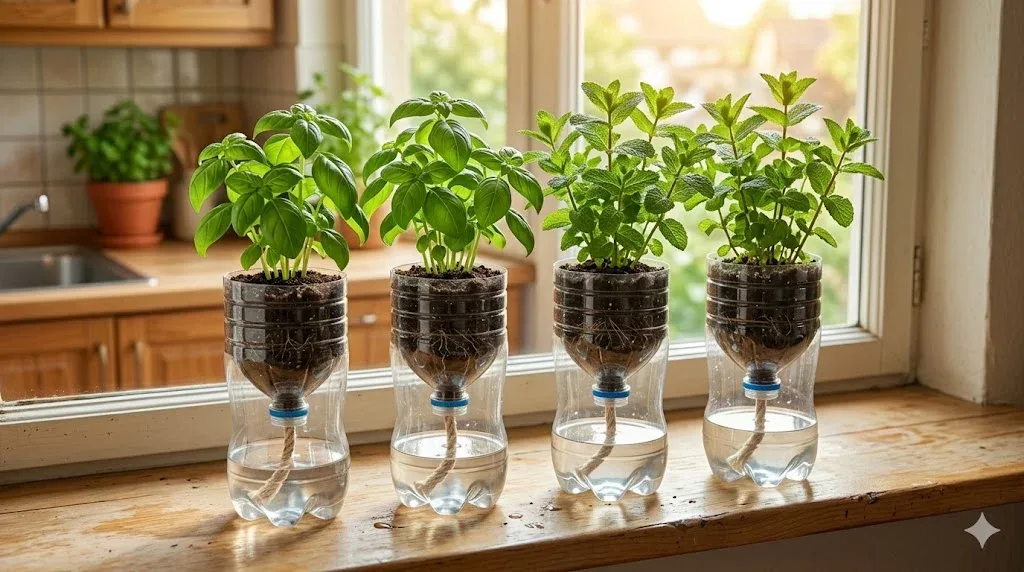
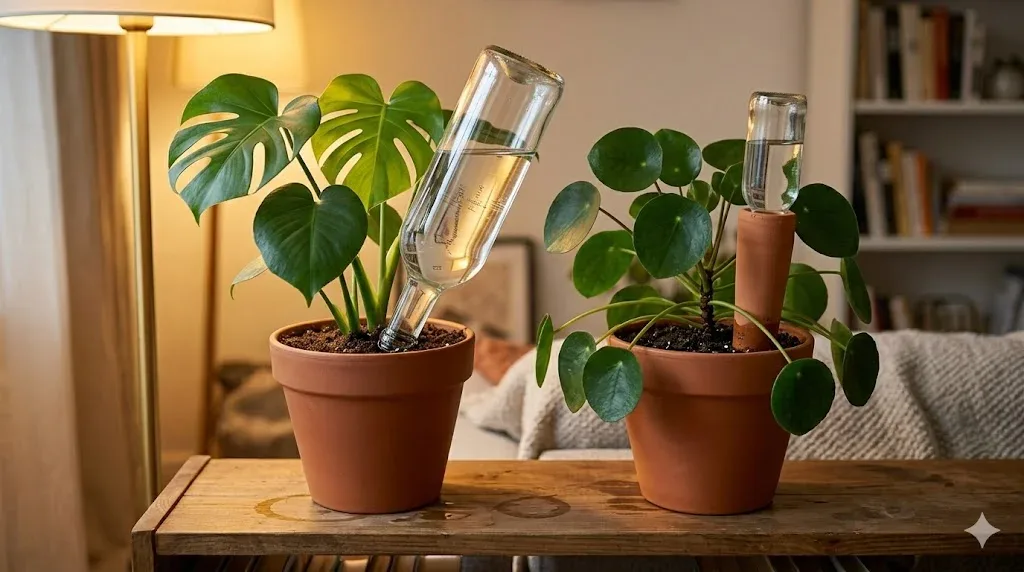
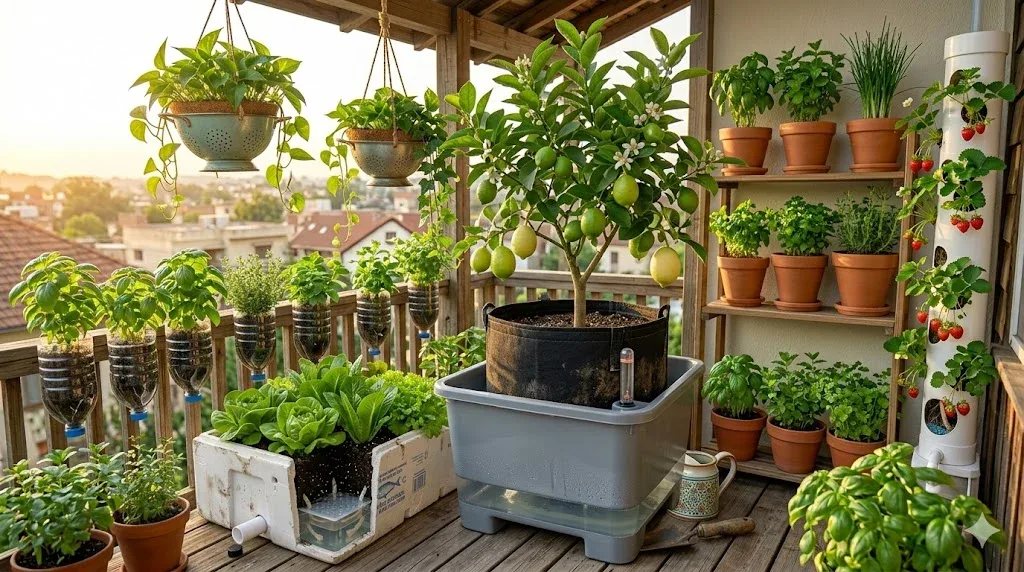
1. The Classic Plastic Bottle Planter
This is where most people start, and for good reason. Take a two-liter plastic bottle, cut it roughly in the middle, flip the top half upside down into the bottom half, thread a cotton rope through the bottle cap hole, fill the top with potting mix, and fill the bottom with water. Done.
The trick is the wick. I used a strip of old cotton t-shirt at first and it worked fine. Later I switched to braided cotton twine, which lasts longer and draws water more consistently. Synthetic materials don’t work well — they don’t absorb moisture the same way.
This is a perfect starter for herbs on a windowsill. I have four of these on my kitchen window right now growing basil and mint.
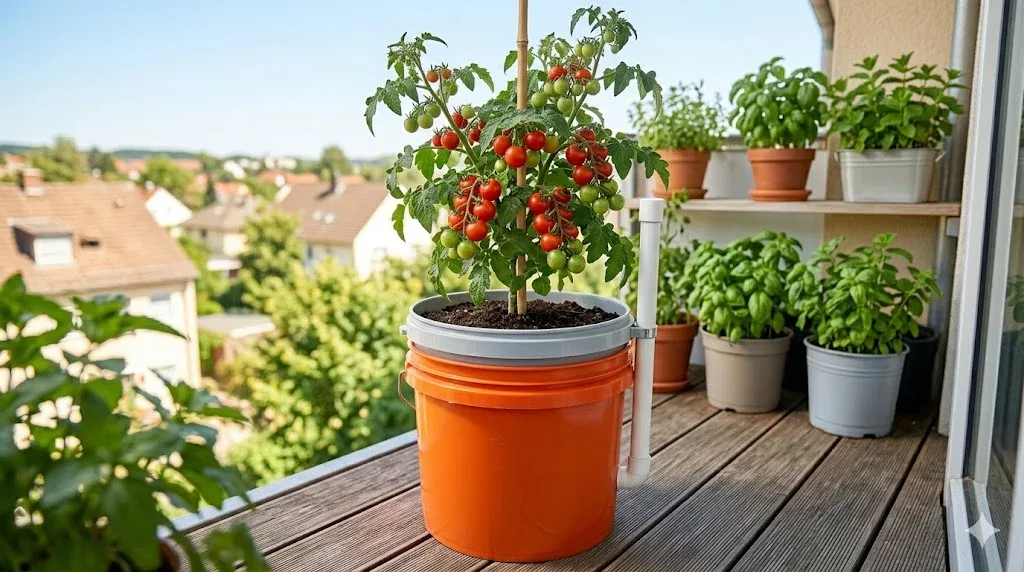
2. Two-Bucket System for Outdoor Plants
Nest a smaller bucket inside a larger one. Drill holes in the bottom of the inner bucket. Fill the gap between the two with water, and put your soil and plant in the inner bucket. A pipe or tube through the inner bucket lets you refill the reservoir without disturbing the roots.
I use this for tomatoes on my balcony. Tomatoes are thirsty and inconsistent watering causes blossom end rot — a problem I dealt with for two whole growing seasons before switching to this setup. Since I started using it, my tomatoes have been noticeably healthier and the fruit doesn’t split the way it used to.
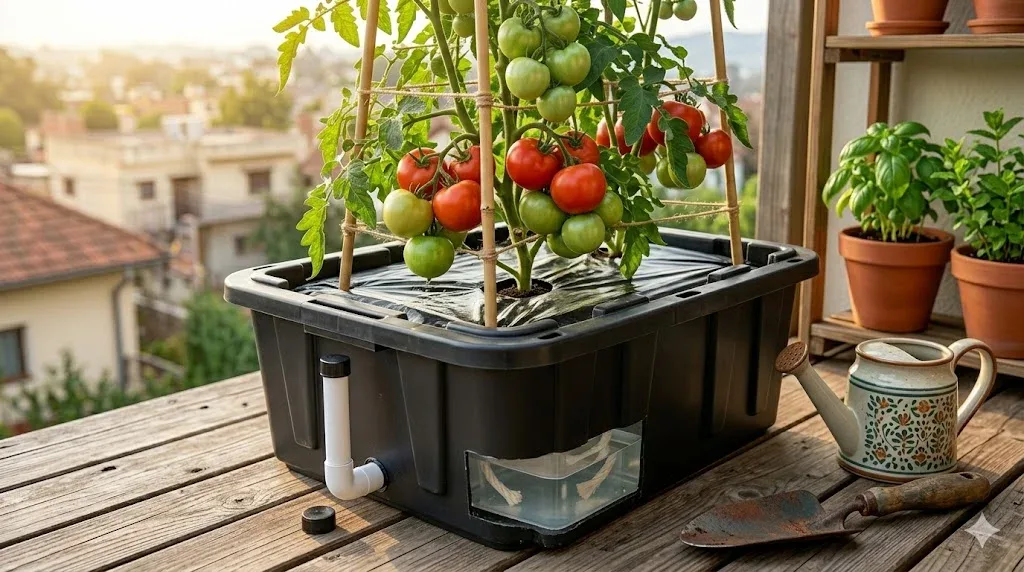
3. Plastic Storage Tote Planter
Those big rectangular storage totes from any dollar store or hardware store are perfect for this. Cut a hole in the lid for a smaller container to sit in (your plant pot), drill a fill hole for a PVC pipe, and add an overflow hole near the top of the reservoir so you never accidentally overfill.
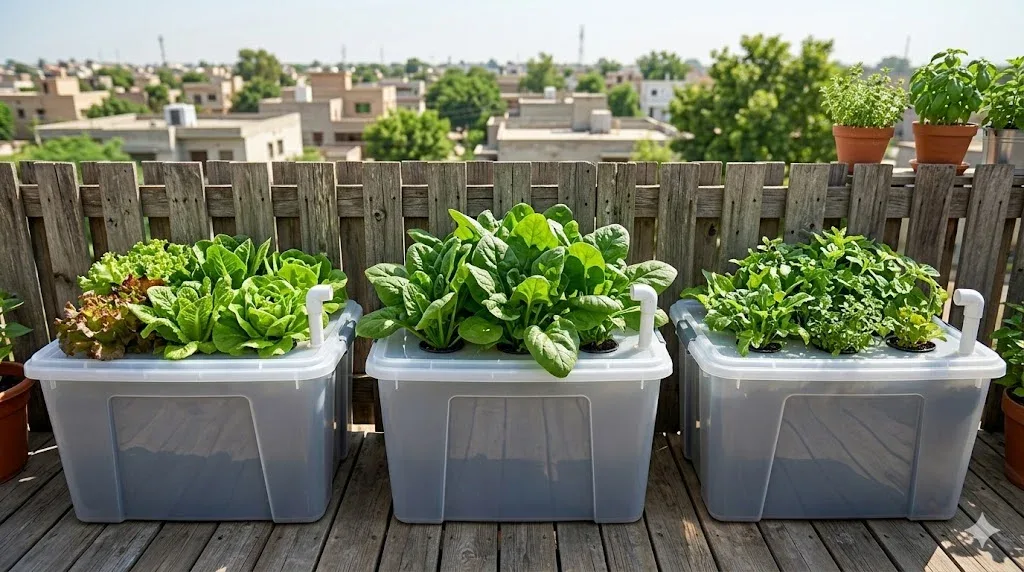
This is the most scalable version I’ve built. I ran three of them along my fence last summer growing lettuce and spinach. I watered them maybe once a week even in hot weather.
4. Wine Bottle Waterer (Passive Drip Method)
Technically not a full self watering planter, but it uses the same principle. Fill an empty wine bottle with water, put your thumb over the opening, flip it quickly into the soil at an angle, and let go. The water drips out slowly as the soil dries.
There are also ceramic spikes sold specifically for this — I’ve used the ones from Terracotta and Copper brand and they work really well for vacations or just forgetful weeks. You can make DIY versions with clay or terracotta cones from a craft store and a water bottle.
5. Self Watering Hanging Planter from a Colander
Line a metal colander with coconut coir liner, sit it over a matching bowl or container, and thread a cotton wick from the bowl up through the colander drainage holes into the soil. Hang the whole thing with jute rope.
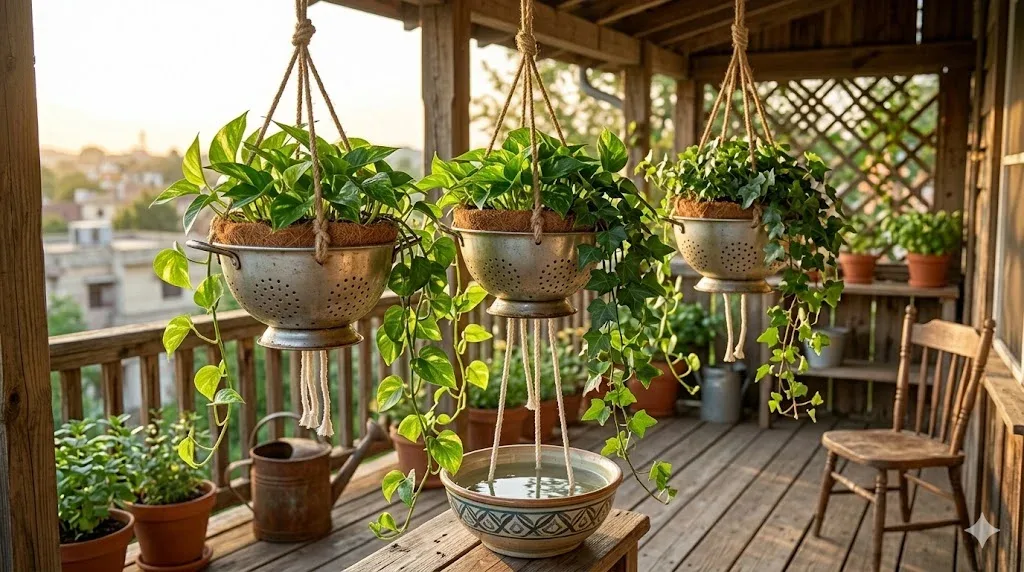
This one looks genuinely beautiful. I made three of them for my porch and people always ask where I bought them. The coir liner slows moisture evaporation and the whole setup keeps trailing plants like pothos or ivy consistently happy.
6. Mason Jar Herb Garden with Wicking System
Wide-mouth mason jars, small net pots that fit inside the opening, and a cotton wick. The jar holds the water reservoir, the net pot holds the soil and plant, and the wick connects the two. You can fit four or five of these on a shelf and they look great.
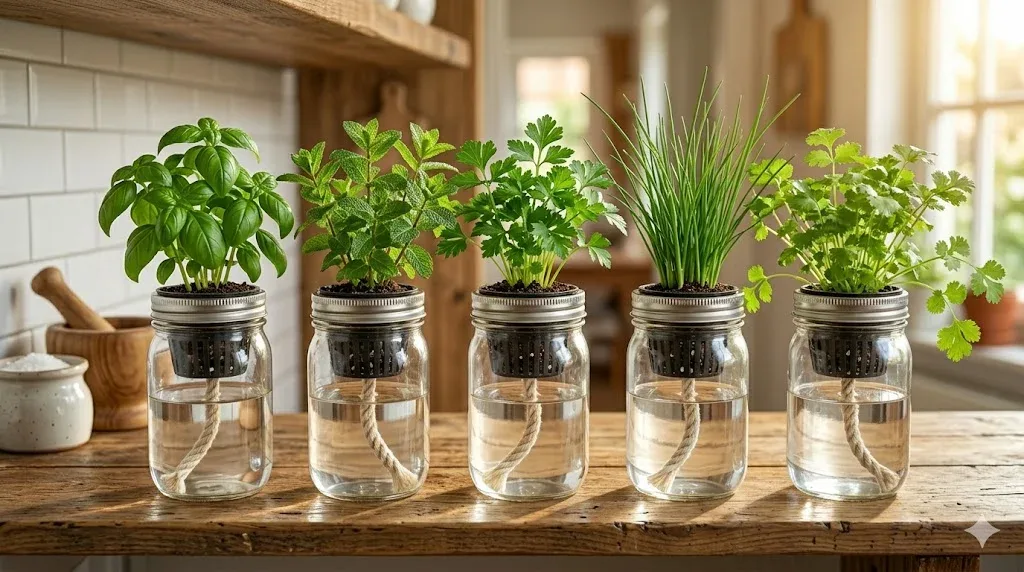
Important lesson I learned: don’t use regular potting mix in these — it compacts too much and the wick struggles to pull moisture through it. Use a lighter mix with perlite added, or a coco coir blend. Game changer.
7. Repurposed Cooler Planter
Old plastic coolers are thick, UV resistant, and — most importantly — already designed to hold water. Drill holes in a plastic tray that fits inside, set it on top of some PVC pipe pieces to create a gap (that gap is your reservoir), fill with soil, and plant away.
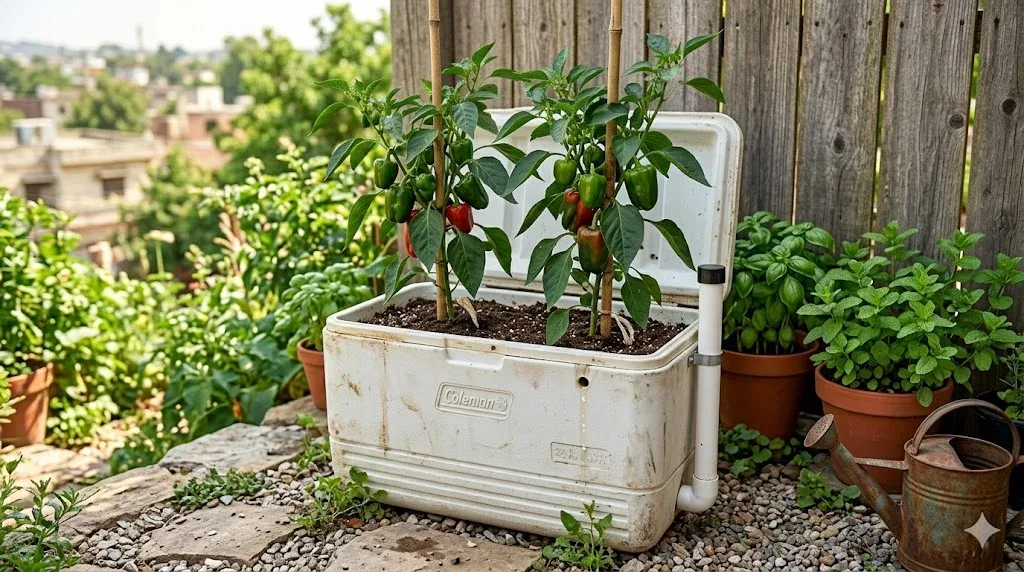
I picked up an old cooler at a garage sale for two dollars. It’s now my best-performing outdoor planter for peppers. The thick walls also help regulate soil temperature.
8. Fabric Grow Bag with a Reservoir Insert
Fabric grow bags are popular because they air-prune roots, which leads to stronger, denser root systems. The downside is they dry out fast. The fix: place your fabric bag inside a slightly larger solid container and leave a gap at the bottom for water.
The fabric wicks moisture upward naturally without any extra wick material. I built this for a dwarf lemon tree and it’s been thriving for two seasons now.
9. Wooden Crate Self Watering Box
Line a wooden wine or produce crate with heavy plastic sheeting (a garbage bag works), then build a raised false bottom inside using a plastic tray with holes. The space below the false bottom is your reservoir.
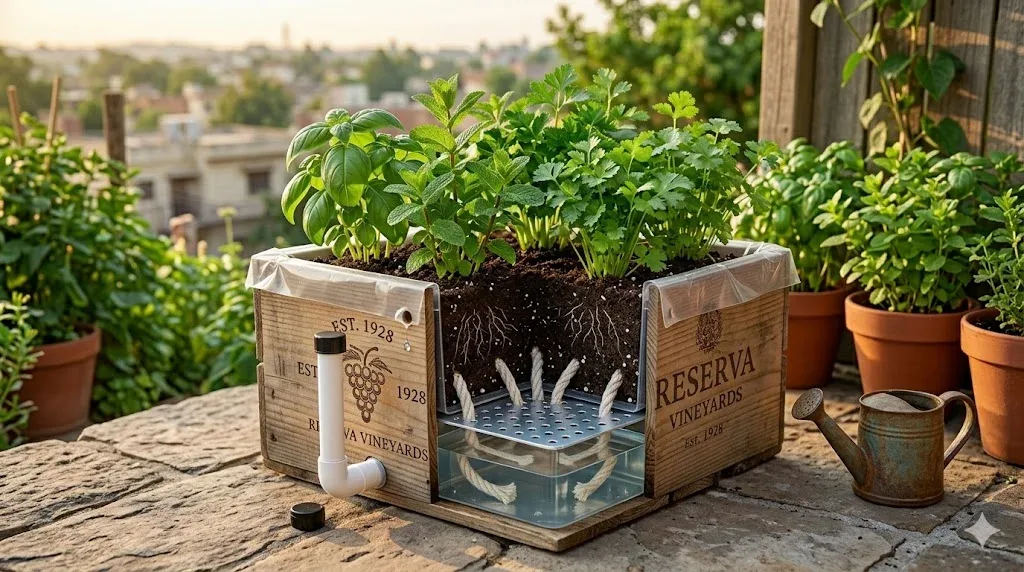
Drill a fill tube hole through the side of the crate and an overflow hole at the height of your reservoir’s maximum water level. This is a good weekend project and the wooden exterior looks rustic and intentional — not like a science experiment.
10. Upcycled Colander and Pot Combo
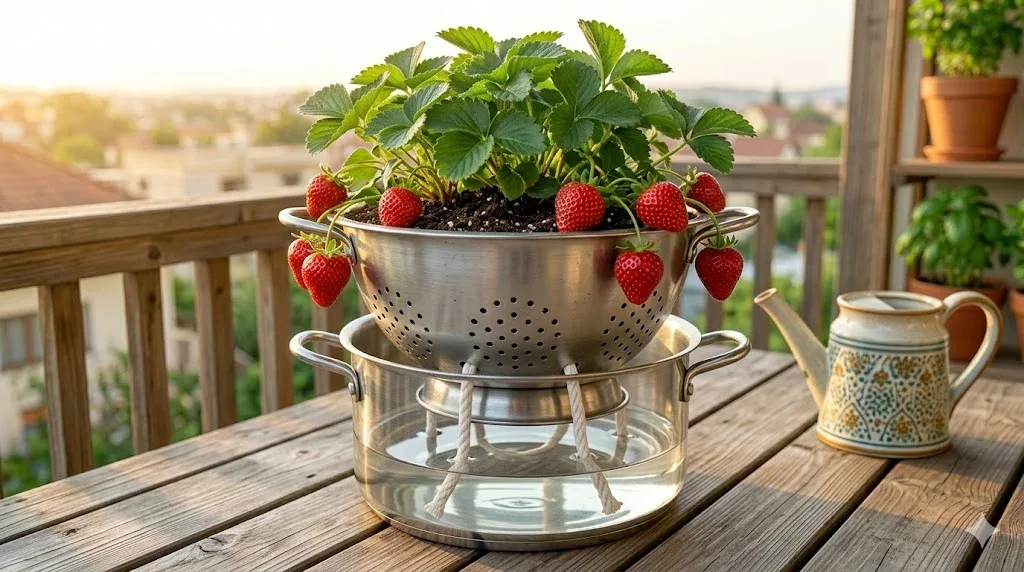
Similar to the hanging colander idea but grounded. Find a colander and a matching pot where the colander sits just above the bottom of the pot (leaving a water gap). Thread wicks through the colander holes. This works especially well for strawberries and small herbs.
11. PVC Pipe Vertical Garden with Self Watering Channels
Cut a long PVC pipe (4-inch diameter works well), drill holes along one side for plants to sit in, cap the bottom, and drill a small overflow hole near the top. Stand it vertically, fill with soil, plant strawberries or herbs in the holes, and pour water in from the top. The water works its way down slowly through the soil.
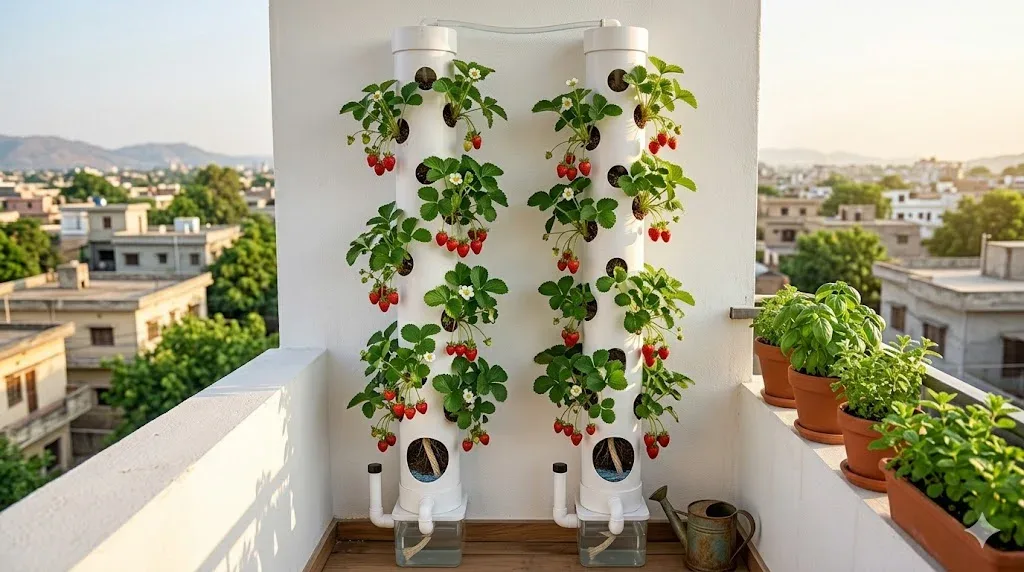
This setup is vertical so it works on balconies with limited floor space. I mounted two of these against a wall and grew a full season of strawberries.
12. Terracotta Pot Inside a Bucket
Terracotta is naturally porous. Place a terracotta pot inside a watertight bucket with some space between them. Fill the outer bucket with water. The terracotta slowly lets moisture through into the soil. You don’t need a wick at all — the pot does the work.
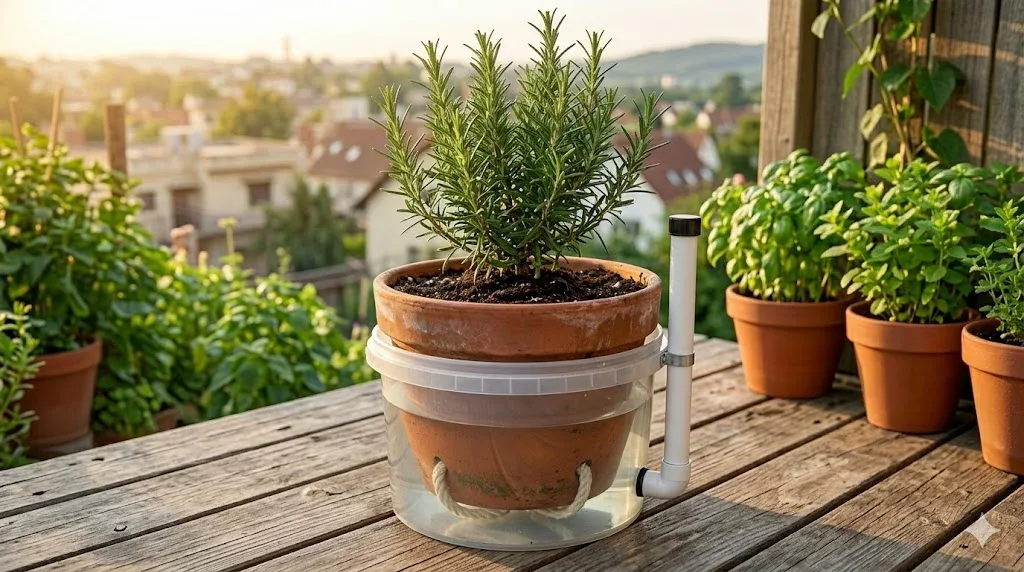
This is one of my favorites for larger plants because it scales up easily. Use a five-gallon bucket and a matching terracotta pot for big herbs like rosemary or larger vegetables.
13. Egg Carton Seedling Starter with Self Watering Tray
For seed starting, cardboard egg cartons over a shallow water-filled tray create a basic wicking system. The cardboard absorbs moisture from below and keeps the seedling cells consistently damp — which is exactly what germinating seeds need.
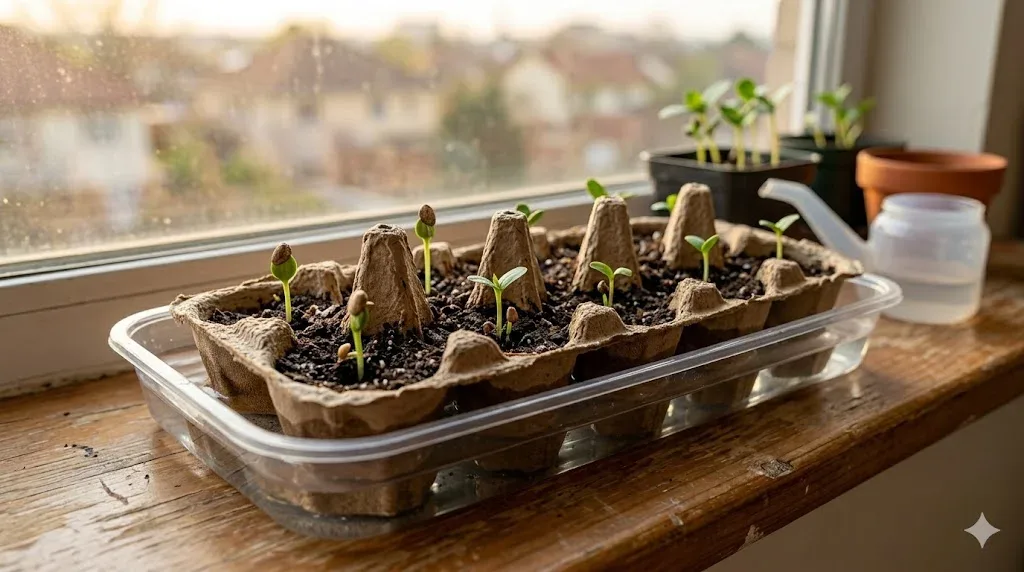
This isn’t a permanent setup, but for starting seeds in late winter before transplanting, it works beautifully and costs almost nothing.
14. Styrofoam Box Planter
Styrofoam fish boxes (the kind seafood is shipped in) are thick, insulating, and free if you know where to ask — try your local fish market. Create a false bottom inside with a plastic tray and wicks, drill a fill hole and overflow hole, and you have an insulated self watering planter that performs surprisingly well in both hot and cold weather.

I used one of these for growing lettuce through a mild winter and it was one of the most successful setups I’ve ever tried.
15. The DIY EarthBox-Style Planter
The EarthBox is a commercial self watering container that serious vegetable gardeners swear by. You can replicate the basic design with a large plastic storage bin, a cut plastic tray for the false bottom, PVC fill tube, overflow hole, and a plastic mulch cover over the top to reduce evaporation.
This is the most involved build on this list, but it’s also the most productive. I grew indeterminate tomatoes in one of these and the output was honestly shocking for a container garden. Cover the soil surface with plastic sheeting cut to fit and you’ll reduce water loss dramatically in summer heat.
Mistakes I Made (So You Don’t Have To)
Using the wrong wick material was my biggest early mistake. Synthetic rope barely wicks anything. Stick to natural cotton or jute.
Skipping the overflow hole is another one. The first tote planter I built had no overflow hole. I filled the reservoir on a rainy week and the roots ended up sitting in too much water. The overflow hole protects against this.
Not checking the reservoir for weeks is a mistake I still occasionally make. These systems need less attention, not zero attention. A quick check once a week — especially in summer — keeps everything working.
Also, not all plants want this setup. Cacti, succulents, and anything that needs very dry conditions between waterings don’t do well with constant moisture access from below. These planters are best for vegetables, herbs, and most houseplants that prefer consistent moisture.
What I Grow in Mine Now
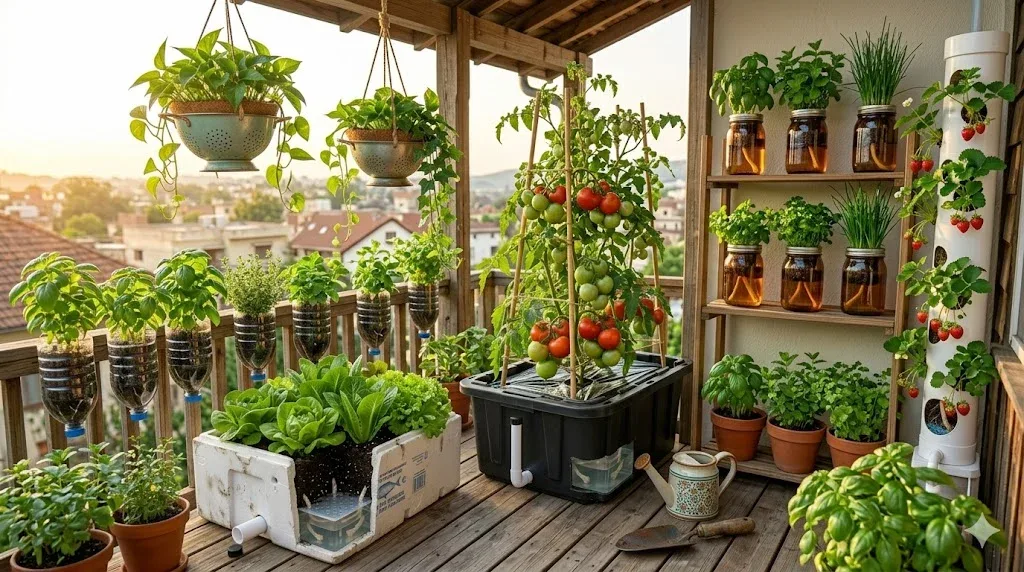
Between my apartment balcony and indoor shelves, I currently have self watering setups growing basil, mint, cherry tomatoes, chili peppers, lettuce, spinach, a dwarf Meyer lemon, and several pothos and peace lilies. My watering routine has gone from a stressful daily thing I’d forget to a once-a-week reservoir check that takes about ten minutes total.
If you’re someone who loves the idea of growing things but keeps losing plants to inconsistent care, this approach changes everything. Start with the bottle planter — it takes about twenty minutes and costs nothing. Once you see that it actually works, you’ll want to build five more.
That’s genuinely how it happened for me, and I’ve never looked back.


