How to Store Pots and Pans in Small Kitchens

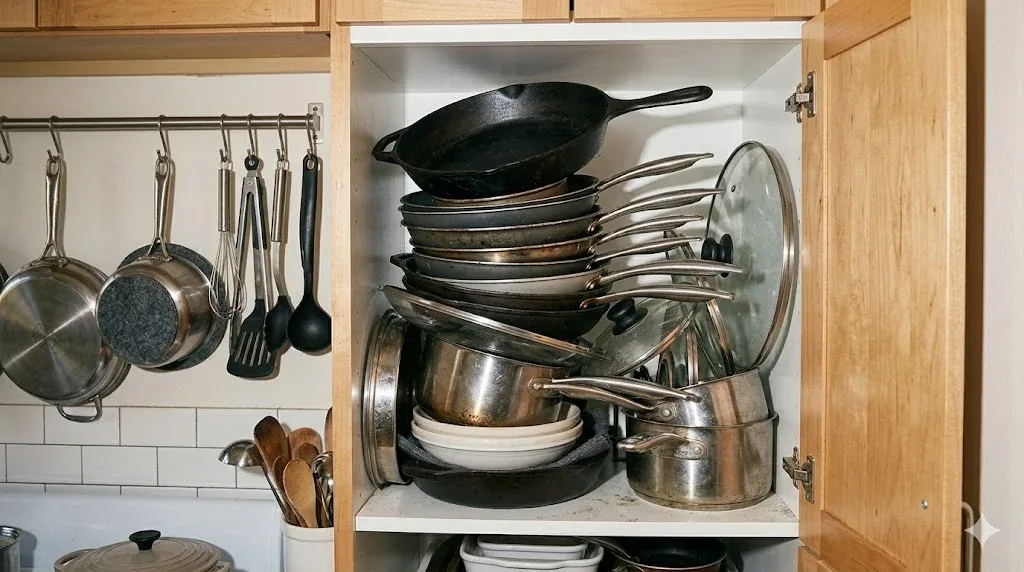
I still remember the morning I opened my cabinet and a cast iron skillet came crashing down, narrowly missing my bare foot. That was the moment I knew my small kitchen storage situation had officially become a safety hazard.
I was living in a 650-square-foot apartment at the time, and my kitchen was the size of a generous closet. One overhead cabinet, about 18 inches of counter space, and zero pantry. I had accumulated pots and pans over the years — a Dutch oven from my mom, a set of stainless steel pans I bought on sale, a wok I used twice, a griddle pan I was convinced I’d use more often. The math was not mathing.
If you’re dealing with a small kitchen and a growing cookware collection, you already know the frustration. Things get stacked too high, lids roll off constantly, and every time you need the one pot at the bottom, you have to move everything above it. It’s exhausting. But after a lot of trial and error (and one bruised foot), I figured out a system that genuinely works.
Why Most Small Kitchen Storage Advice Falls Flat
Here’s the thing — a lot of the advice out there assumes you have more space than you think you do. “Use a pot rack!” Great, but what if your ceiling is low and your landlord won’t let you drill? “Get a kitchen island!” Wonderful, but not when your kitchen barely fits two people standing side by side.
The real problem isn’t lack of storage. It’s unused vertical space, poor organization habits, and holding onto cookware you genuinely don’t use. I’ll get into all three.
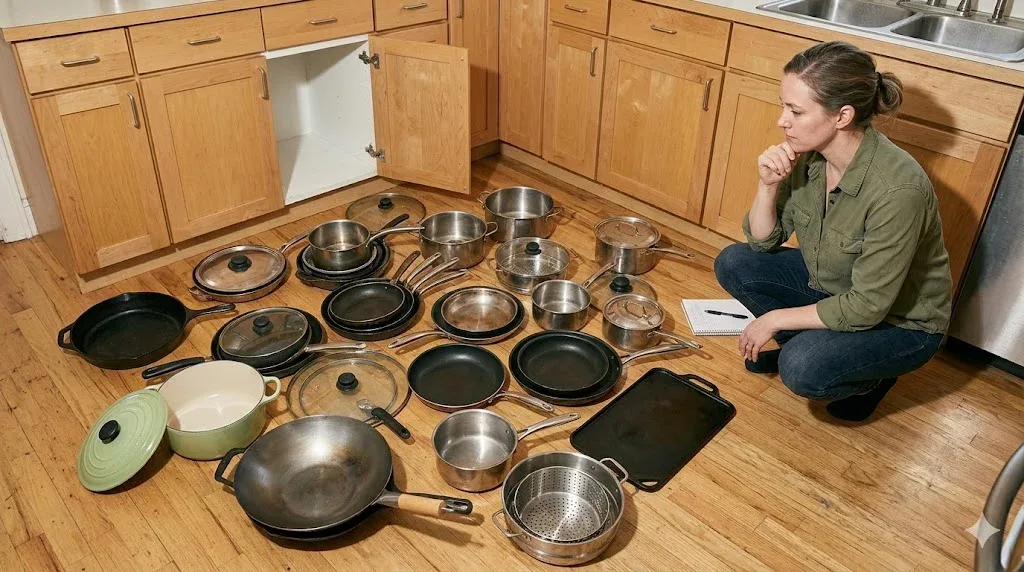
Step 1: Do an Honest Cookware Audit
Before you buy a single organizer or hook, you need to look at what you actually own.
Pull everything out. Every pot, every pan, every lid. Put it all on the floor or counter and look at it. Now ask yourself honestly: when did I last use this?
I had a steamer insert I hadn’t touched in two years. A fondue pot someone gave me as a housewarming gift. A sauté pan with a wobbly handle I kept meaning to replace. These were taking up prime real estate in a tiny kitchen.
The rule I use: if I haven’t used it in six months, it either gets donated or goes into the back of a higher shelf. The things I reach for every single week — my 12-inch non-stick pan, my medium saucepan, my stockpot — those get the most accessible spots. The Dutch oven I use once a month? It can live on a higher shelf.
This one step alone freed up about 30% of my cabinet space.
Step 2: Use Vertical Space Inside Cabinets
Most people stack pots directly on top of each other, which means you’re using the floor of the cabinet but ignoring all the height above your stacks.
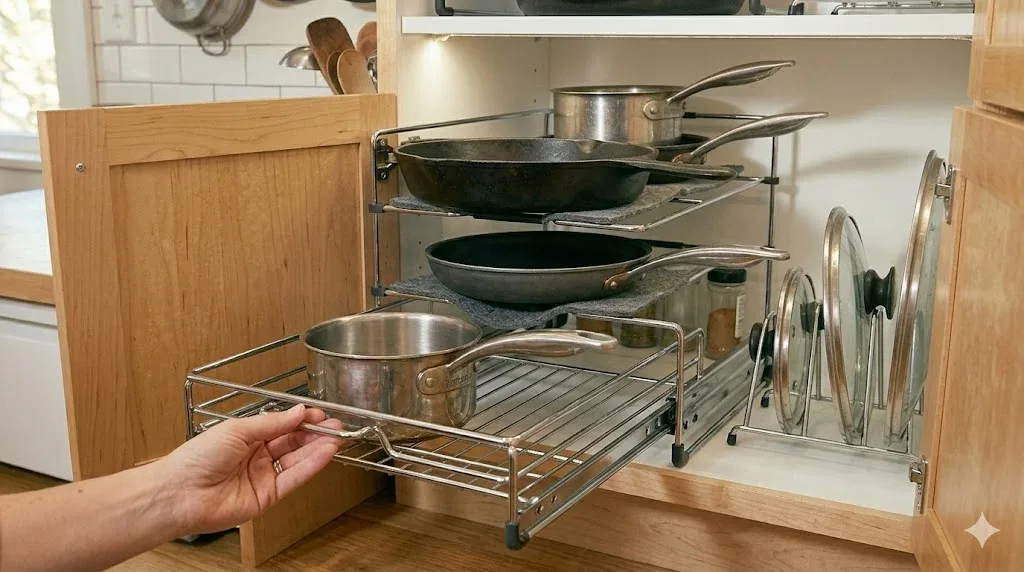
The game-changer for me was a tiered pot organizer. These are simple racks, usually expandable, that let you stack pans on different levels within the same cabinet. I found mine on Amazon for under $25 (the Lynk Professional Pull-Out Cabinet Organizer is a popular one, though there are cheaper versions that work just as well). Suddenly I could see every pan without moving anything.
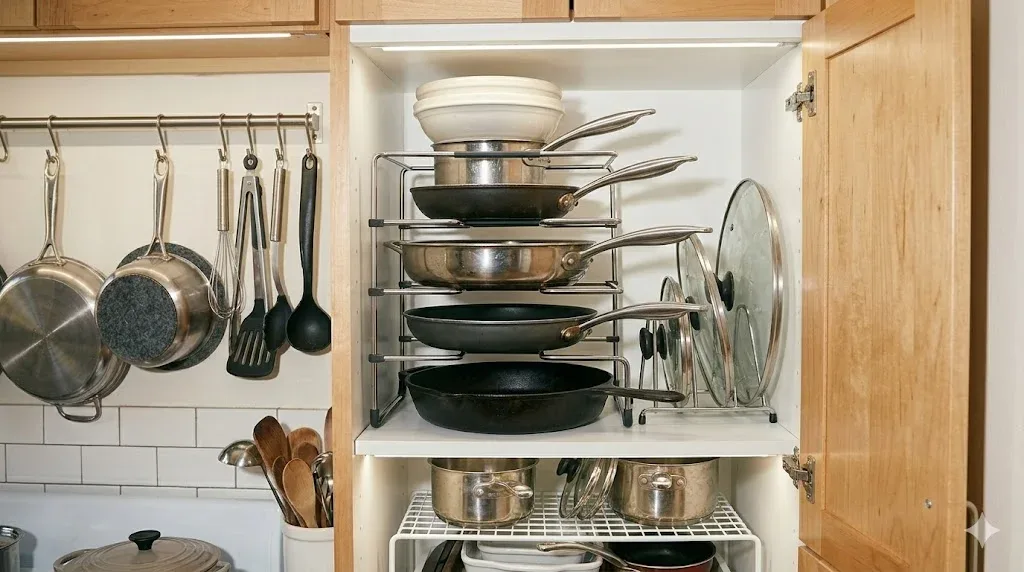
Another thing that helped massively: lid organizers. Lids are the worst offenders in small kitchens. They don’t stack neatly, they slide everywhere, and they take up way more space than they should. A simple wire lid rack — the kind that stands upright and holds lids vertically like books on a shelf — completely changed how my cabinet looked. You can find them for around $10 to $15, and they hold four to six lids depending on the size.
If you have a deep cabinet, consider a pull-out shelf insert. It’s basically a sliding drawer that sits inside your existing cabinet. You slide it out to access what’s in the back instead of reaching in blindly and knocking everything over. This was probably my single best investment — around $30 to $40 and completely transformed an awkward deep cabinet.
Step 3: Hang What You Can
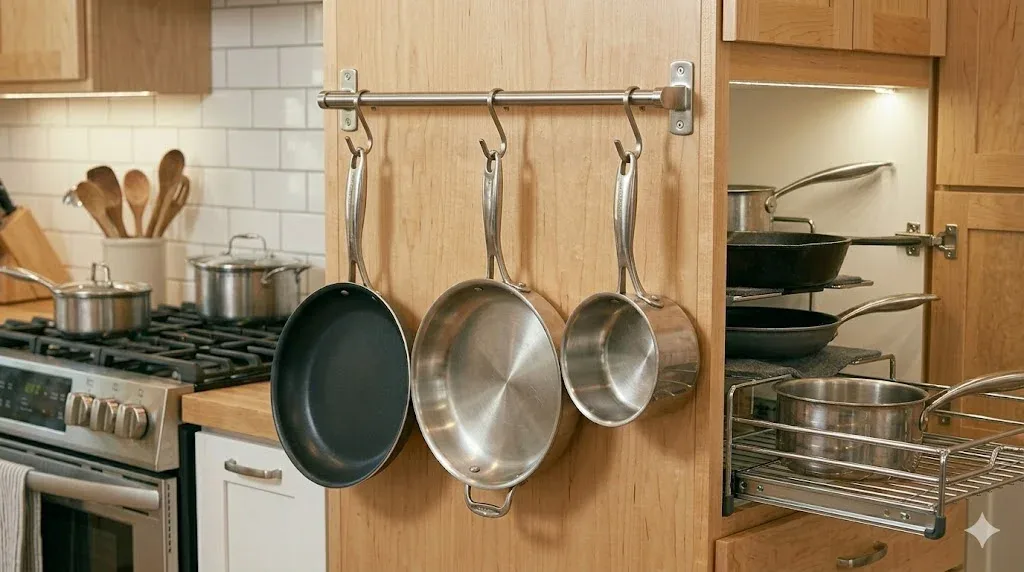
I know I said the pot rack advice can be unrealistic, but there are versions that actually work in small spaces without drilling into ceilings.
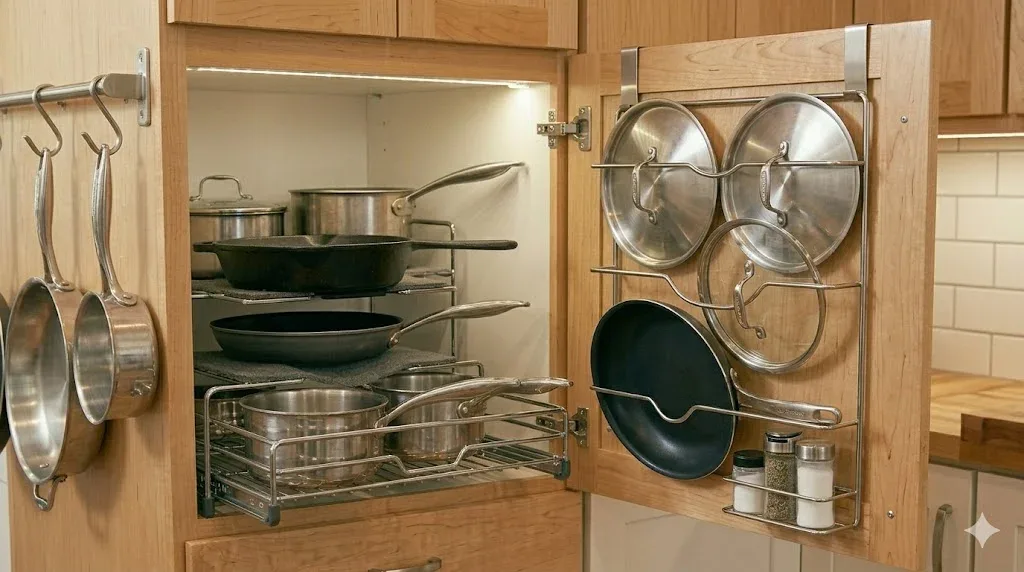
If you have any wall space at all — even a small stretch between cabinets or beside your stove — wall-mounted rails with S-hooks are incredibly useful. IKEA’s KUNGSFORS rail system is affordable and renter-friendly if you use the right wall anchors. You can hang pans, lids, even a colander off these rails.
I hung a simple stainless rail on the side panel of my upper cabinet (the part facing the kitchen, not the ceiling) and suddenly had hanging space for my three most-used pans. They’re now within arm’s reach every single morning.
If drilling is truly off the table, look at over-the-door organizers designed for cabinet doors. Some are specifically designed to hold lids and small pans flat against the inside of the cabinet door. These use no tools and attach with adjustable hooks.
Step 4: Think Beyond the Kitchen
This one took me a while to consider, but it made a real difference: not everything has to live in the kitchen.
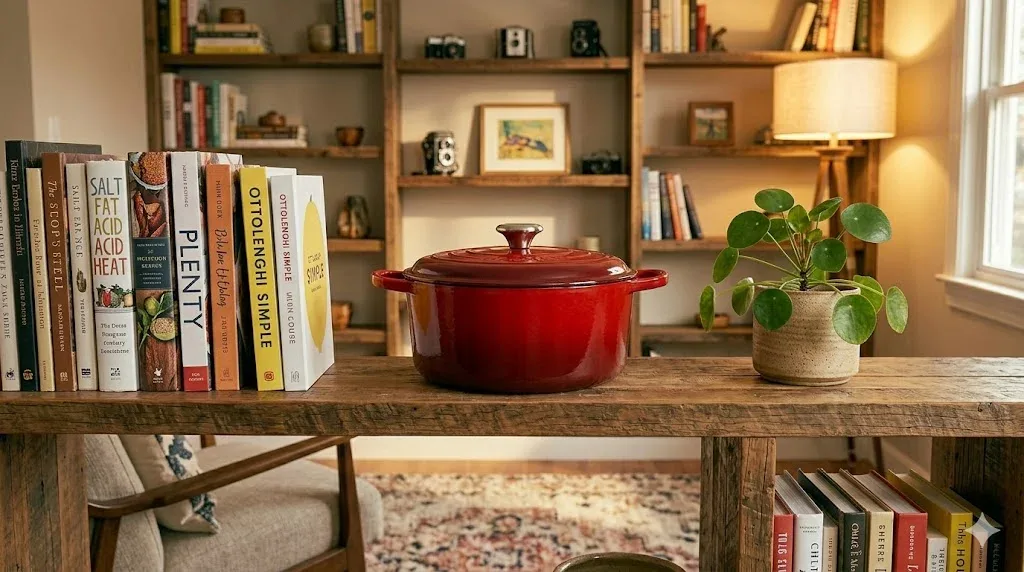
My cast iron Dutch oven is heavy, beautiful, and I use it maybe twice a month. It now lives on a low shelf in my living room styled like a decorative piece next to some cookbooks. Sounds strange, but it works. Some people keep their roasting pans in the oven itself when not in use — just remember to take them out before preheating.
If you have a storage closet nearby, lightly used cookware can live there. A single dedicated shelf in a hall closet for overflow cookware is completely reasonable. Your kitchen doesn’t have to hold everything — it just has to hold what you use regularly.
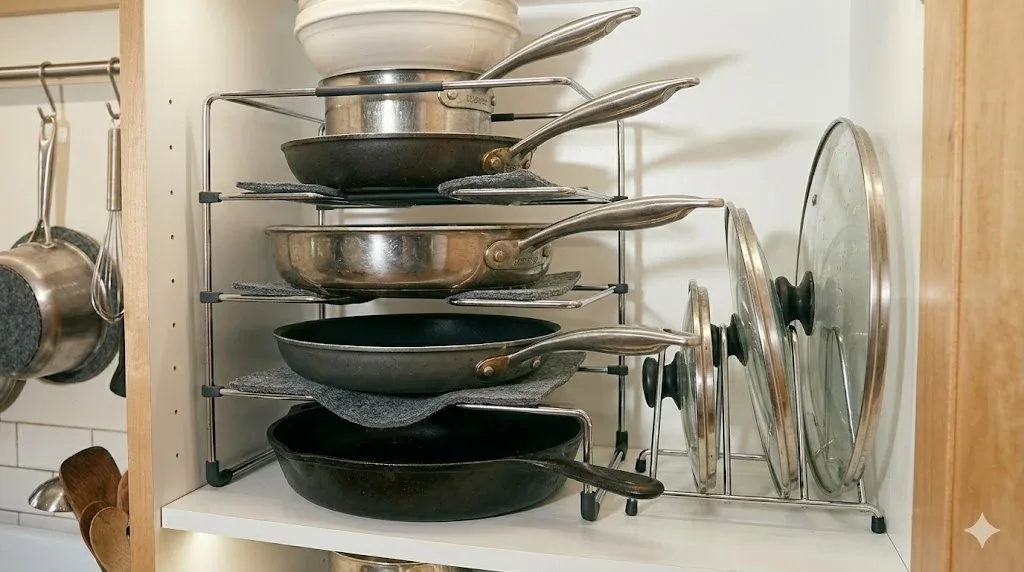
Step 5: Nest Smartly, Not Lazily
Nesting pots and pans is fine — but there’s a right way to do it.
The lazy version: stack everything on top of each other with lids on, creating a tower that topples when you breathe near it.
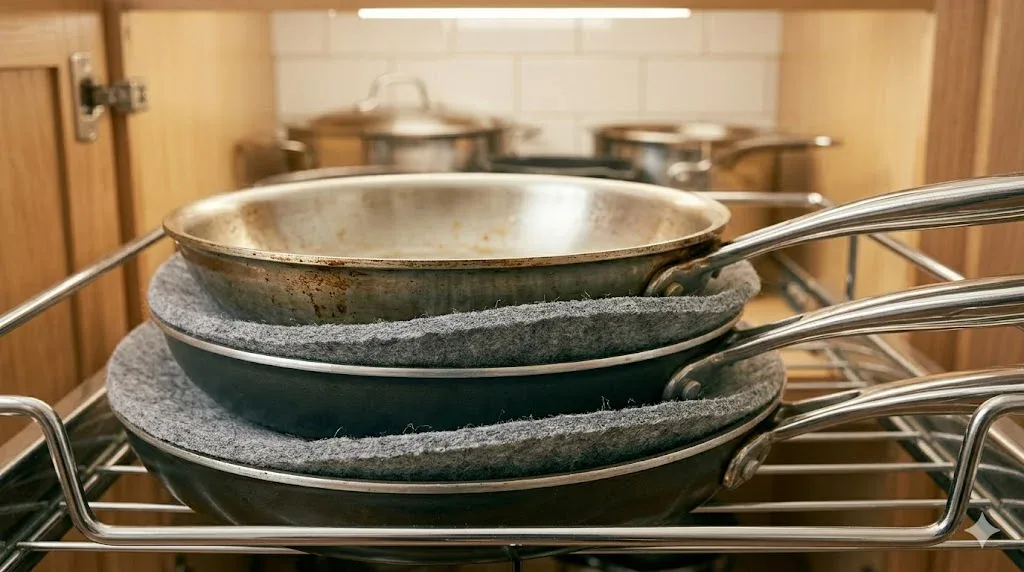
The smarter version: nest pans without lids, store all lids separately in an upright rack, and place a felt protector pad between each pan. These little felt circles (you can get a pack of 20 for a few dollars) prevent scratches between pans and also make it easier to lift individual pans out of the stack without dragging the others with it.
For pots, nest the smaller inside the larger, remove the lids entirely, and store the lids vertically in their rack. It sounds like a small thing but the time you save every morning when you’re just trying to make oatmeal is genuinely worth it.
Common Mistakes People Make
Buying organizers before decluttering. This is the biggest one. Organizers don’t create space — they just manage it. If you have too much stuff, no organizer will save you.
Ignoring the cabinet door. The inside of cabinet doors is usable space that most people completely ignore. Even a few hooks can hold measuring cups or small lids.
Keeping matching sets together out of obligation. A lot of us have pan sets where we only use two of the five pieces. It’s okay to store the unused ones elsewhere or donate them. You don’t have to keep the full set together just because it came that way.
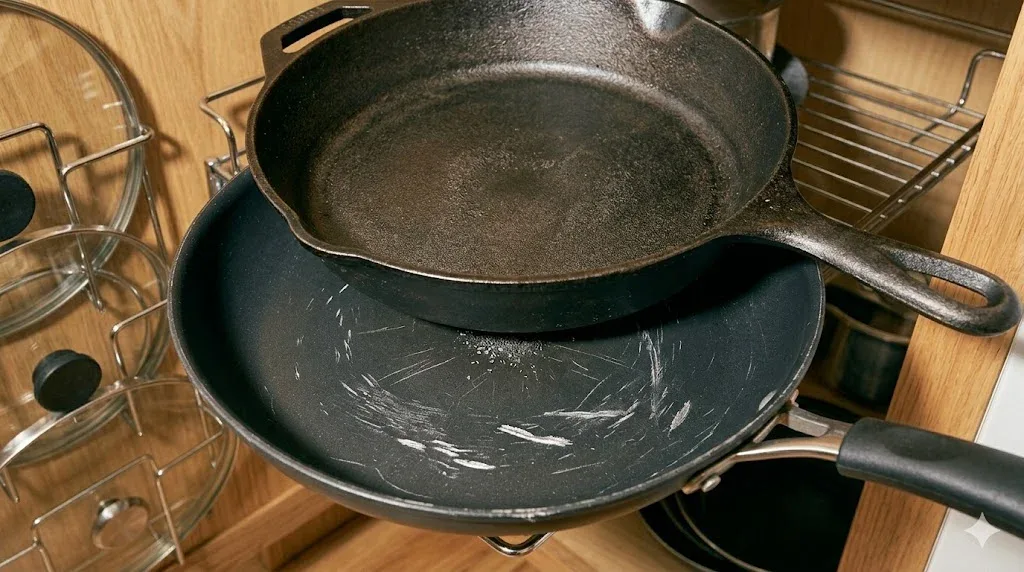
Stacking heavy pans on top of lighter ones. Always put the heaviest, most stable piece on the bottom of any stack. Putting a heavy cast iron on top of a thin non-stick pan will warp the non-stick over time.
Forgetting to reassess periodically. Your cooking habits change. What you needed last year might not be what you need now. I do a quick cookware check every few months — it takes ten minutes and keeps things from piling up again.
The Setup That Actually Works for Me Now
Here’s my current system, just so you have a real-world reference point.
My most-used pans (non-stick skillet, stainless sauté pan, small saucepan) hang on a wall rail beside my stove. My medium and large pots nest inside each other on a tiered cabinet organizer, with felt pads between them. All lids stand upright in a wire lid rack on the same shelf. My Dutch oven lives on a low shelf in the living room. My stockpot, which I use maybe once a month for soup, is on the highest cabinet shelf and I use a step stool to get it.
Is it perfect? No. But I can now find any pot or pan in under ten seconds, nothing falls when I open a cabinet, and my kitchen actually feels manageable.
One Last Thing
Small kitchens don’t have to feel chaotic. The secret isn’t buying more stuff — it’s being more deliberate about what stays and where it lives.

Start with the audit. Be ruthless. Then use vertical space, hang what you can, and separate lids from pots. You don’t need to spend a lot of money to make a real difference. Most of the tools I mentioned cost less than $30 each, and some cost nothing at all — just a willingness to rethink how you’re using the space you already have.
Your kitchen is small, but it can absolutely work for you. Mine does, and trust me — if you’d seen what it looked like before, you’d know that’s saying something.


